
Replacing a USB embedded hypervisor flash device

Use this information to replace a USB embedded hypervisor flash device.

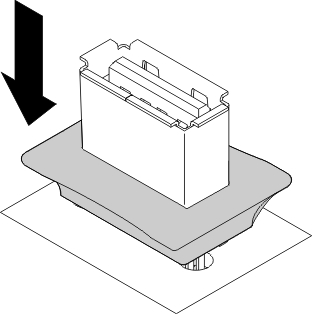
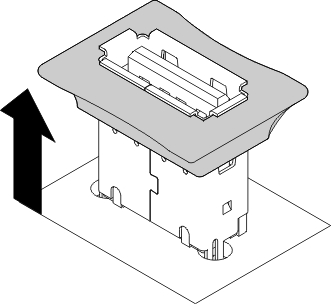
To replace a hypervisor flash device, complete the following steps:

  1. Read the safety information that begins in Safety and Installation guidelines.
  2. Turn off the server (see Turning off the server) and all attached peripheral devices. Disconnect all power cords; then, disconnect all external cables from the server.
  3. Carefully turn the server on its side so that it is lying flat, with the cover facing up.
    Attention
    Do not allow the server to fall over.
  4. Unlock and remove the left-side cover (see Removing the left-side cover).
  5. Remove the fan assembly if necessary (see Removing the fan assembly).
  6. Remove the air baffle if necessary (see Removing the air baffle).
  7. Remove the existing flash device from the USB hypervisor connector (see Removing a USB embedded hypervisor flash device).
  8. Unlock the retention latch by pushing it down toward the system board.


  9. Align the flash device with the USB connector on the system board and push it into the USB connector until it is firmly seated.
  10. Return the retention latch to the locked position by pulling it away from the system board.


  11. Reconnect the power cord and any cables that you removed.
  12. Reinstall the left-side cover (see Replacing the left-side cover).

If you have other devices to install or remove, do so now. Otherwise, go to Completing the installation.