Removing the hot-swap backplane on the rear hard disk drive cage
Use this information to remove the hot-swap backplane on the rear hard disk drive cage.
The following illustrations show two different types of hot-swap backplanes.
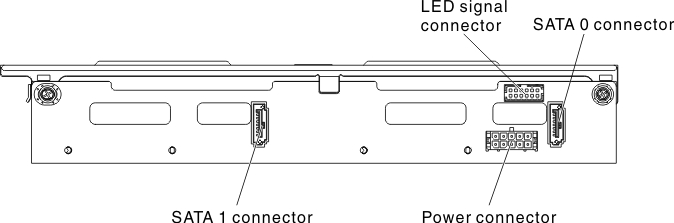
- Type 1 - SATAFigure 1. Type 1 - SATA
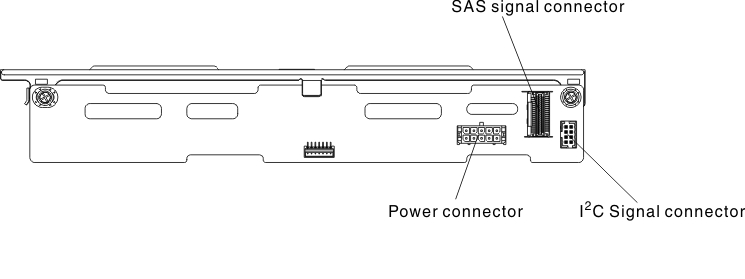
- Type - SASFigure 2. Type 2 - SAS
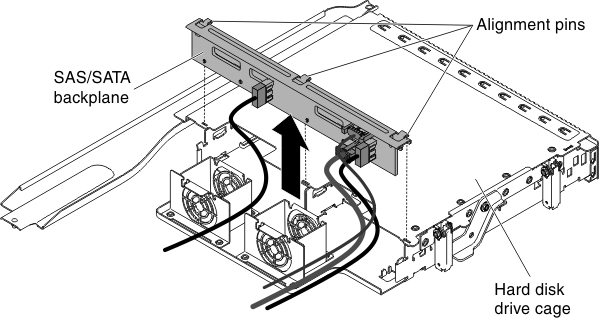
To remove the hot-swap backplane on the rear hard disk drive cage, complete the following steps.
- Lift the backplane out of the rear hard disk drive cage. Figure 3. Hot-swap backplane removal
- Disconnect the cables.
- Type 1 - SATA
- Disconnect the LED signal, SATA signal and power cables from the backplane. Make note of which cable is connected to which connector.Figure 4. Type 1 - SATA
- Disconnect the LED signal, SATA signal and power cables from the backplane. Make note of which cable is connected to which connector.
- Type 2 - SAS
- Disconnect the I2C signal, SAS signal and power cables from the backplane. Make note of which cable is connected to which connector.Figure 5. Type 2 - SAS
- Disconnect the I2C signal, SAS signal and power cables from the backplane. Make note of which cable is connected to which connector.
- Type 1 - SATA
Give documentation feedback