
Removing the upper power supply card from the power-supply paddle card assembly

Use this information to remove the upper power supply card from the power-supply paddle card assembly.

Note
The power-supply paddle card assembly includes the upper and lower power supply paddle cards.

To remove the upper power supply card, complete the following steps:

  1. Read the safety information that begins on page Safety and Installation guidelines.
  2. Turn off the server (see Turning off the server) and all attached peripheral devices. Disconnect all power cords; then, disconnect all external cables as necessary to replace the device.
  3. Remove the server cover (see Removing the server top cover).
  4. Remove the power supply out of the server to disconnect it from the power-supply paddle card assembly.
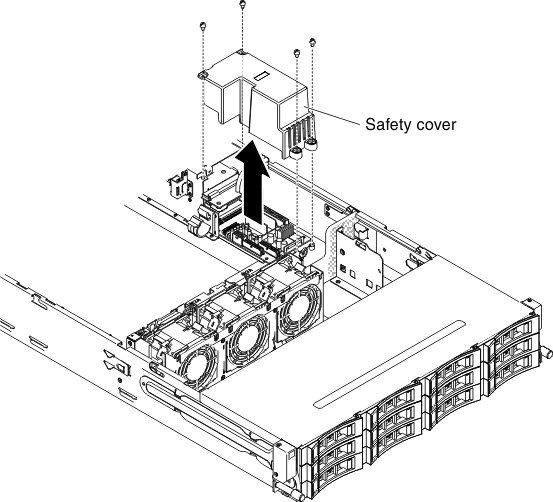
  5. Remove the screws that secure the safety cover (240VA cover) to the chassis and remove the safety cover.
    Figure 1. Screws removal
    Screws removal
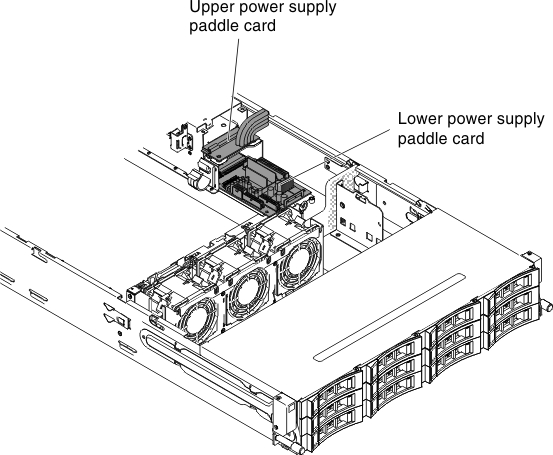
  6. After removing the safety cover, you can see the upper power supply card and lower power-supply paddle card.
    Figure 2. Upper power supply card and lower power-supply paddle card
    Upper power supply card and lower power-supply paddle card
  7. Make note of where the cables between the upper power supply card and lower power-supply card are connected; then, disconnect them.
  8. Remove the screws that secure the upper power supply card to the chassis.
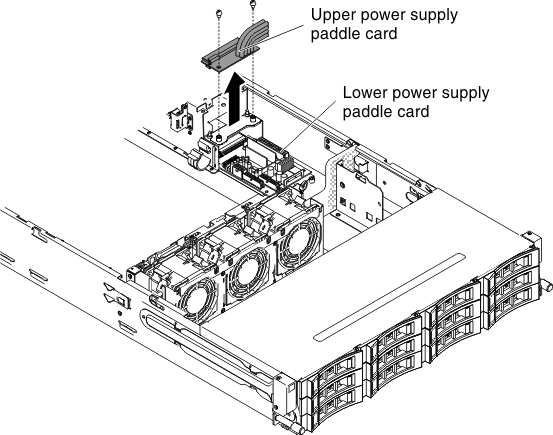
  9. Lift the upper power supply card out of the server.
    Figure 3. Upper power supply card removal
    Upper power supply card removal
  10. If you are instructed to return the upper power supply card, follow all packaging instructions, and use any packaging materials for shipping that are supplied to you.