Replacing a rear fan
Use this information to replace a rear fan.
For proper cooling, the server requires that all fans in the system be operating at all times.
Attention
To ensure proper server operation, if a fan fails, replace the fan immediately.
See System-board internal connectors for the locations of the fan cable connectors.
Read the safety information that begins on page Safety and Installation guidelines
To install or replace a rear fan, complete the following steps
- Touch the static-protective package that contains the new fan to any unpainted metal surface on the server. Then, remove the new fan from the package.
- Orient the fan as the following illustration.Figure 1. Rear fan installation
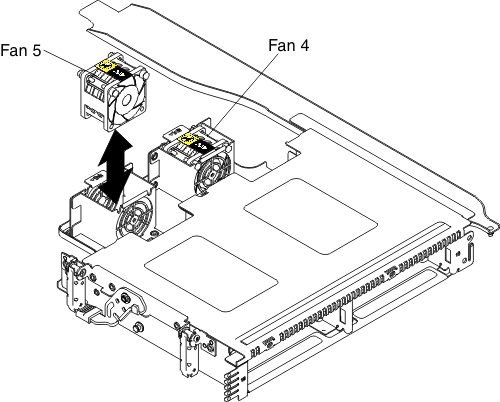
- Lower the fan into the fan slot in the server and ensure that is it seated correctly.
- Connect the system fan cable to the connector on the system board. (see System-board internal connectors)
- Install the server top cover (see Replacing the server top cover).
- Reconnect the external cables; then, reconnect the power cords and turn on the peripheral devices and the server.
Give documentation feedback