Removing the front USB connector assembly cable
To remove the front USB connector assembly cable that is on the side of the server, complete the following steps:
- Read the safety information that begins on page Safety and Installation guidelines.
- Turn off the server (see Turning off the server) and all attached peripheral devices. Disconnect all power cords; then, disconnect all external cables as necessary to replace the device.
- Remove the server top cover (see Removing the server top cover).
- Rotate the hot-swap rear hard disk drive cage up (see Rotating the hot-swap rear hard disk drive cage up.
- Remove the PCI riser-card assembly (see Replacing a PCI riser-card assembly).
- Remove the air baffle (see Removing the air baffle).
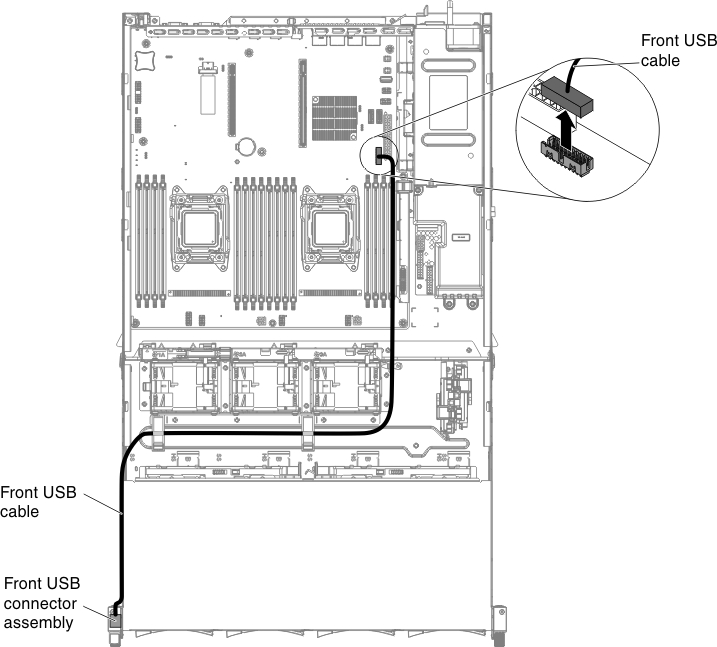
- Make note of where the front USB connector assembly cable is attached to the system board; then, disconnect it.Figure 1. Disconnecting front USB cable
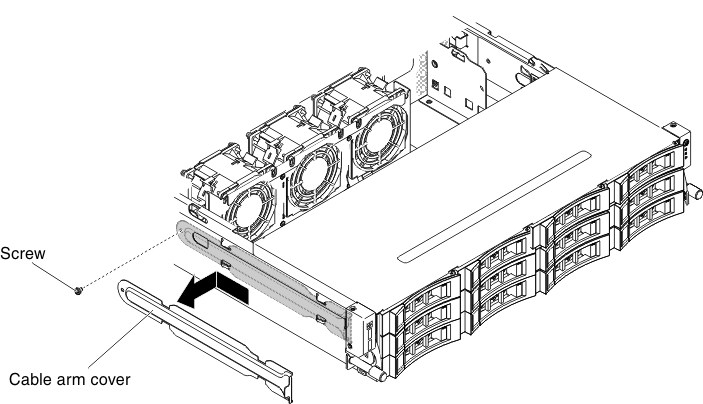
- Remove the screws from the cable arm cover; then, slide the cable arm cover towards the rear of the server and set it aside.Figure 2. Screws removal
- Remove the screws from the front USB connector assembly.Figure 3. Front USB connector assembly removal
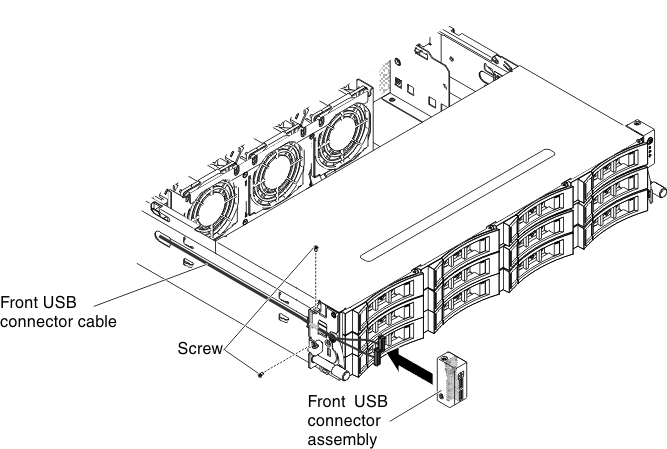
- Disconnect the cable to the front USB connector assembly.
- If you are instructed to return the front USB connector assembly cable, follow all packaging instructions, and use any packaging materials for shipping that are supplied to you.
Give documentation feedback