Replacing the lower power supply card in the power-supply paddle card assembly
Use this information to replace the lower power supply card in the power-supply paddle card assembly.
To install the lower power supply card, complete the following steps:
- Touch the static-protective package that contains the power-supply paddle card to any unpainted metal surface on the outside of the chassis; then, remove the power-supply paddle card assembly from the package.
- Turn off the server (see Turning off the server) and all attached peripheral devices. Disconnect all power cords; then, disconnect all external cables as necessary to replace the device.
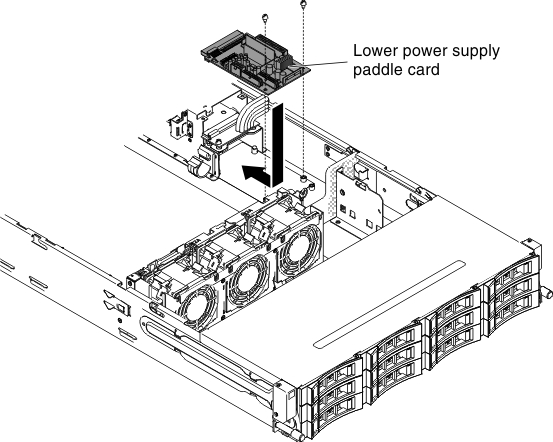
- Place the lower power supply card on the mounting studs on the chassis and align the two holes on the back of the lower power supply card with the two screw holes on the chassis; then install the screws. You might need to tilt the lower power-supply paddle card a little bit to make the installation easier.Figure 1. Lower power supply card installation

- Reconnect the cables between the upper power supply card and lower power-supply paddle card.
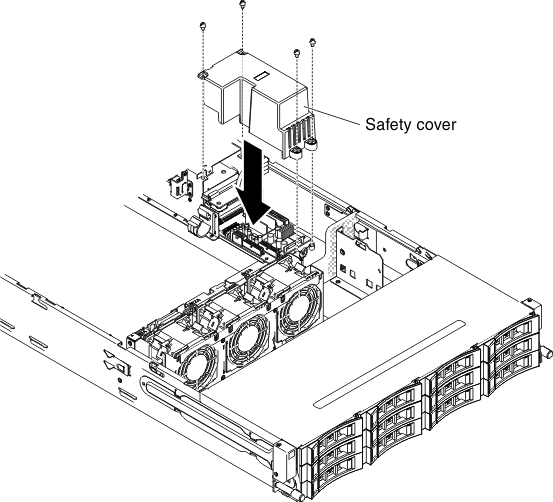
- Align the screw holes on the safety cover (240VA cover) with the screw holes on the chassis; then install the screws to secure the safety cover. Figure 2. Screws installation

- Reconnect any cables that were removed from the lower power-supply paddle card.
- Reconnect the lower power-supply paddle card cables to the system board. You can refer to the internal cable routing section Internal cable routing for further details. Attention
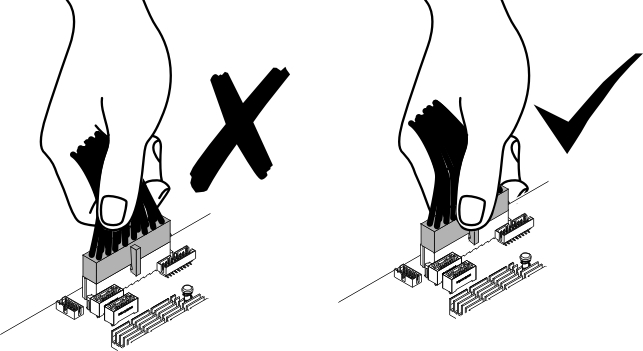
- When reconnecting the power cable connector to the system board, do not grab the wires. Please grab the middle connector to vertically insert the power cable connector to the system board.

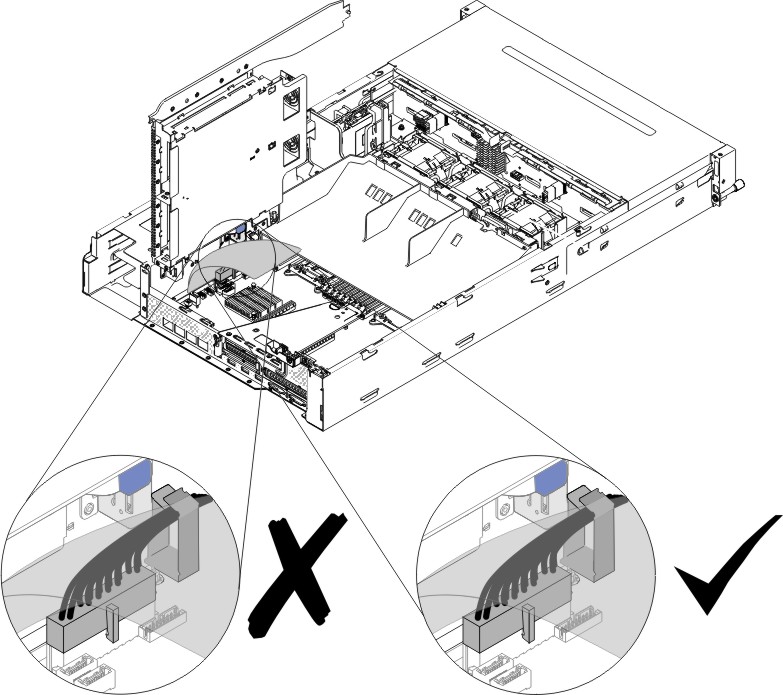
- When reconnecting the power cable connector to the system board, make sure to route the cable underneath the bracket; then, route the cable through the cable retainer clip. The following illustration shows how to route the power cable correctly.Figure 3. Cable routing

- When reconnecting the power cable connector to the system board, do not grab the wires. Please grab the middle connector to vertically insert the power cable connector to the system board.
- Install the air baffle (see Replacing the air baffle).
- Install the PCI riser-card assembly (see Replacing a PCI riser-card assembly.
- Rotate the hot-swap rear hard disk drive cage down (see Rotating the hot-swap rear hard disk drive cage down.
- Install the server top cover (see Replacing the server top cover).
- Install the power supplies.
- Reconnect the external cables; then, reconnect the power cords and turn on the peripheral devices and the server.
Give documentation feedback