Replacing the hot-swap backplane on the rear hard disk drive cage
Use this information to replace the hot-swap backplane on the rear hard disk drive cage.
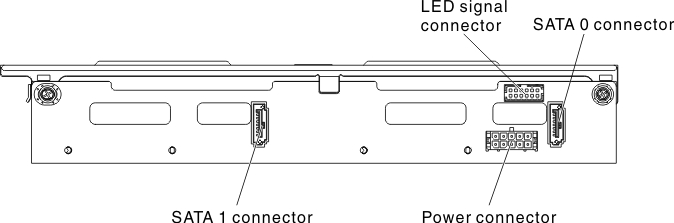
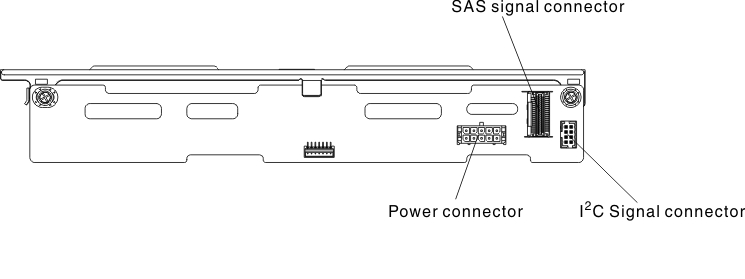
The following illustrations show two different types of hot-swap backplanes.
- Type 1 - SATAAttentionThis backplane has to be cascaded with the front backplane to make the master-slave connection.Figure 1. Type 1 - SATA
- Type - SASNoteThis backplane can be an independent configuration (Cascading with the front backplane is unnecessary)Figure 2. Type 2 - SAS
To install the replacement hot-swap backplane on the rear hard disk drive cage, complete the following steps.
- Reconnect the cables.
- Type 1 - SATA
- Reconnect the LED signal, SATA signal and power cables.Figure 3. Type 1 - SATA
- Reconnect the LED signal, SATA signal and power cables.
- Type 2 - SAS
- Reconnect the I2C signal, SAS signal and power cables.Figure 4. Type 2 - SAS
- Reconnect the I2C signal, SAS signal and power cables.
- Type 1 - SATA
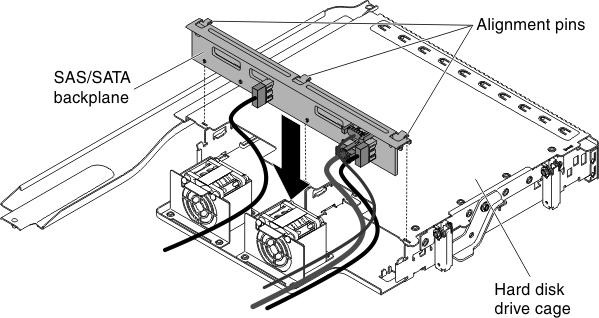
- Lower the backplane into the rear hard disk drive cage. Make sure the three alignment pins securely engages the three holes on the hard disk drive cage.Figure 5. Backplane installation
Give documentation feedback