
Replacing a USB embedded hypervisor flash device

Use this information to replace a USB embedded hypervisor flash device.

To install a USB hypervisor memory key in the server, complete the following steps:

  1. Read the safety information that begins on page Safety and Installation guidelines.
  2. Turn off the server (see Turning off the server) and all attached peripheral devices. Disconnect all power cords; then, disconnect all external cables as necessary to replace the device.
  3. Remove the server top cover (see Removing the server top cover).
  4. Rotate the hot-swap rear hard disk drive cage up (see Rotating the hot-swap rear hard disk drive cage up.
  5. Remove PCI riser-card assembly 1 (seeRemoving a PCI riser-card assembly).
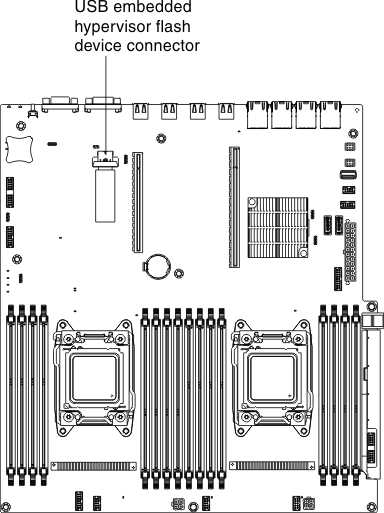
  6. Locate the USB embedded hypervisor flash device connector on the system board.
    Figure 1. USB embedded hypervisor flash device connector
    USB embedded hypervisor flash device connector
  7. Align the USB flash device with the connector on the system board and push it into the connector until it is firmly seated.
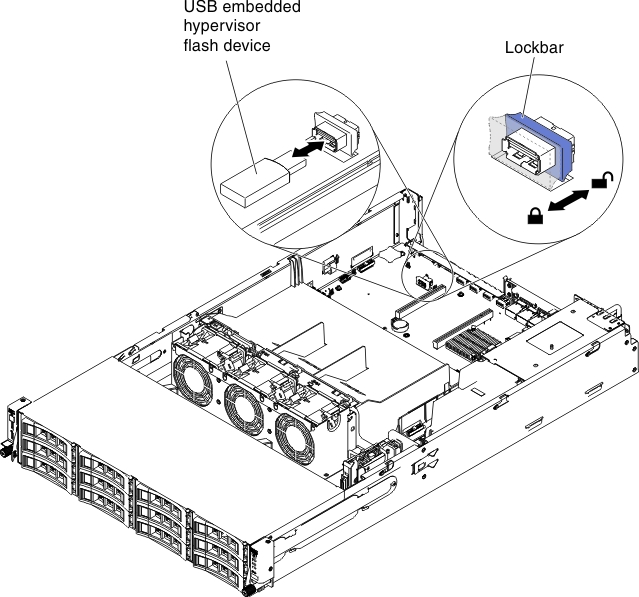
  8. Slide the lockbar toward the riser-card assembly to the locked position until it is seated firmly.
    Figure 2. USB embedded hypervisor flash device installation
    USB embedded hypervisor flash device installation
  9. Install PCI riser-card assembly 1 (see Replacing a PCI riser-card assembly).
  10. Rotate the hot-swap rear hard disk drive cage down (see Rotating the hot-swap rear hard disk drive cage down).
  11. Install the server top cover (see Replacing the server top cover).
  12. Reconnect the power cord and any cables that you removed.
  13. Turn on the peripheral devices and the server.
    Note
    You will have to configure the server to boot from the hypervisor USB drive. See Configuring the server for information about enabling the hypervisor memory key.