Install the rail to the rack
To install the rail to the rack, follow the instructions that are provided below.
About this task
Read Installation Guidelines and Safety inspection checklist to ensure that you work safely.
- A video of this procedure is available at YouTube.
Procedure
- Collapse both rails.
1 Front of rail 2 Rear of rail 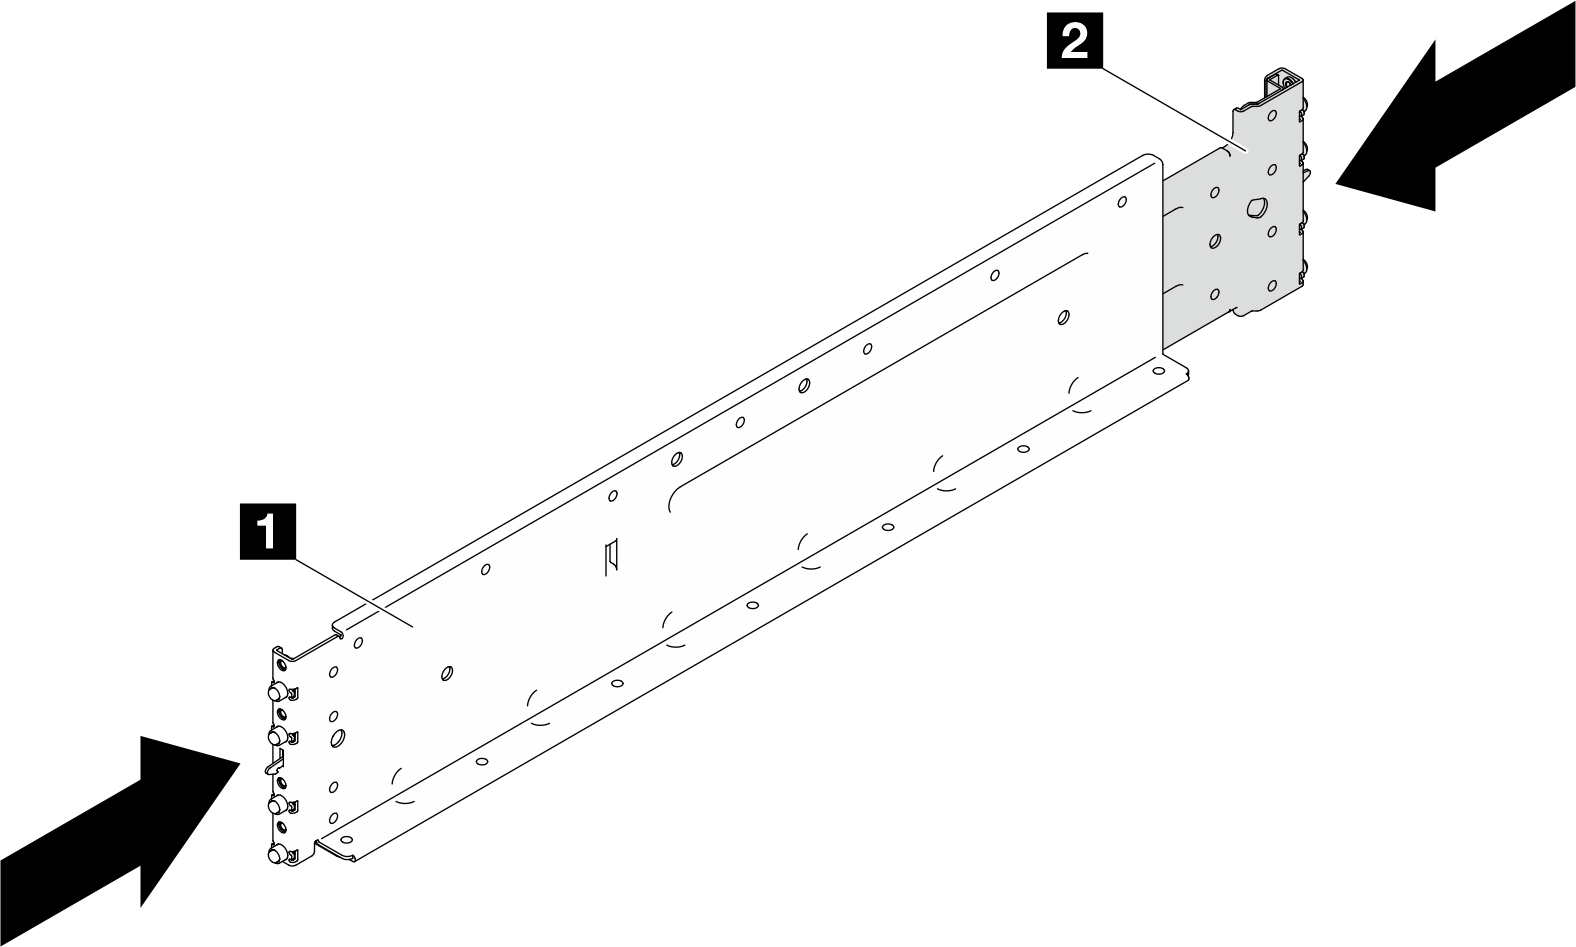
- Install the rails in the rack.
 Insert the rear rail pins through the holes in the rear EIA flange and engage the locking hooks.
 Insert the front rail pins through the holes in the front EIA flange and engage the locking hooks.NoteIf a rail is incorrectly aligned, lift up the locking hook (2) on the rail to disengage the hook; then, remove and reposition the rail.
1 Pins (four pins on each side of the rail) 2 Locking hook 3 Thread holes for M5 screws (four thread holes on each side of the rail) 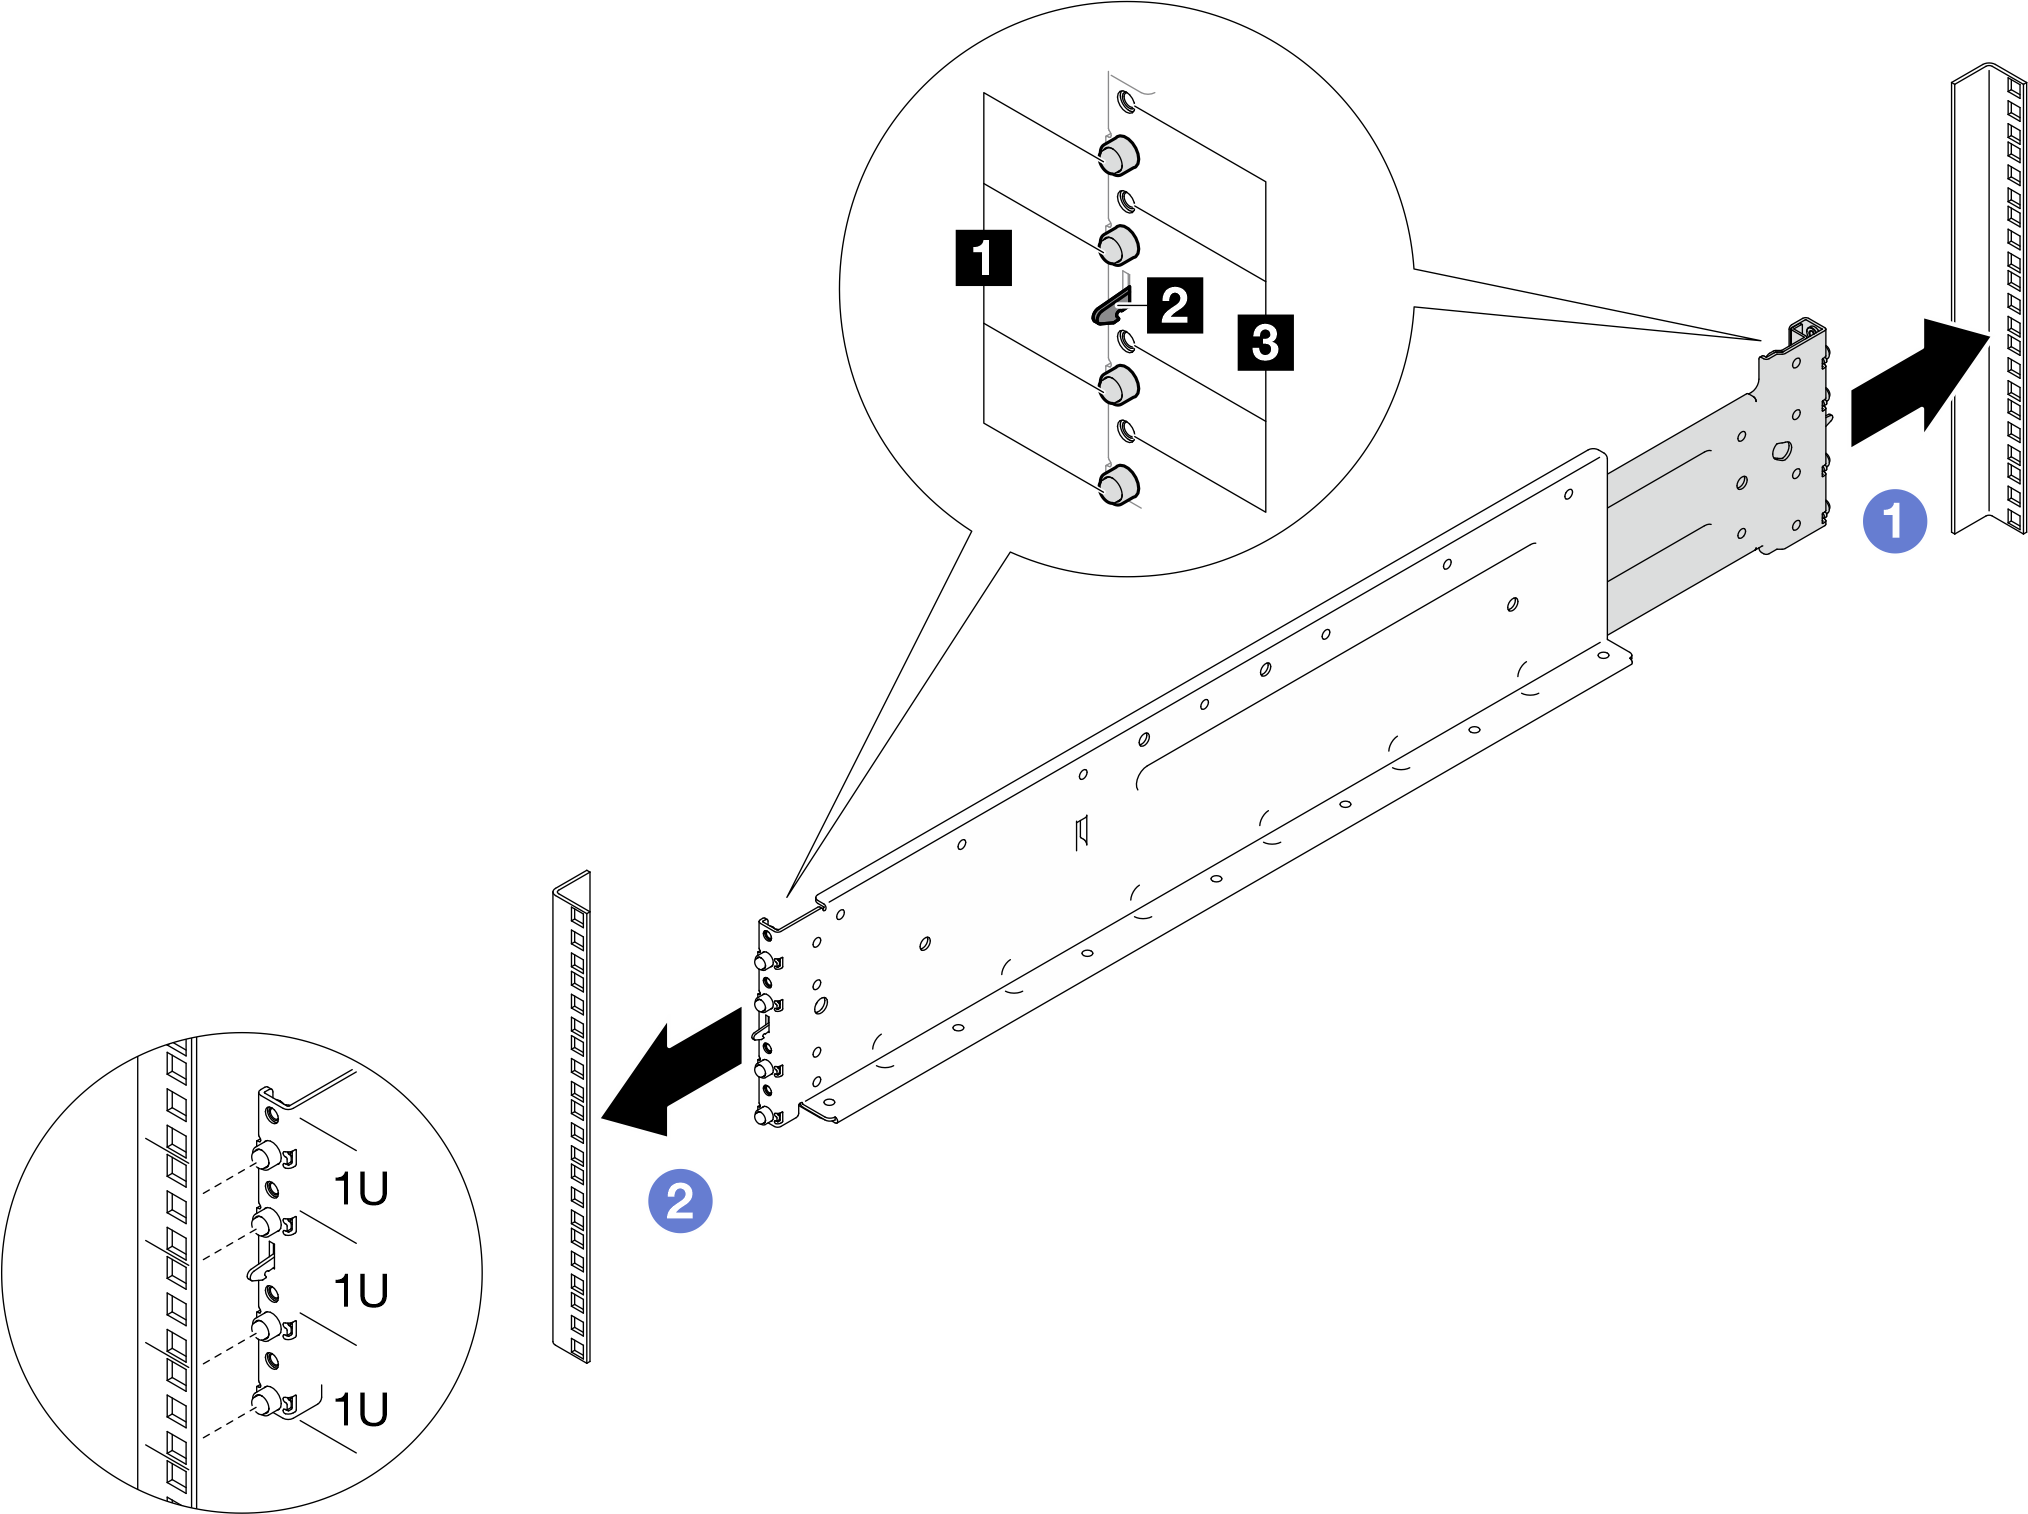
Install the enclosure to the rack. See Install the enclosure in the rack.
Install the enclosure mid-plate assembly. See Install the mid-plate assembly.
Install upper and lower manifold. See Install the manifold.
Install all Power Conversion Station (PCS) cage. See Install a Power Conversion Station (PCS) cage.
Install all Power Conversion Stations (PCS). See Install a Power Conversion Station (PCS).
Install the SMM3. See Install the SMM3.
Install the blank filler. See Install the blank filler.
Install all trays into the front of the enclosure. See Install a tray in the enclosure.
- Install any other required components.
- Connect all required cables.
- Connect the enclosure to power.
- Update the solution firmware to the latest level.
- Update the Serial Number and Machine Type on the Enclosure label of the new enclosure to SMM3:
Log in to the SMM3 web interface.
Go to , and update the Serial Number and Machine Type.
- Restart any nodes that you shut down. See Power on the solution.
- The SMM3 is powered-on automatically.