Remove the HMC card
Follow instructions in this section to remove the HMC card. The procedure must be executed by a trained technician.
About this task
Attention
- Read Installation Guidelines and Safety inspection checklist to ensure that you work safely.
- Power off the server and peripheral devices and disconnect the power cords and all external cables. See Power off the server.
- If the server is installed in a rack, slide the server out on its rack slide rails to gain access to the top cover, or remove the chassis from the rack. See Remove the server from rack.
- Two people and one lifting device on site that can support up to 400 lb (181 kg) are required to perform this procedure. If you do not already have a lifting device available, Lenovo offers the Genie Lift GL-8 material lift that can be purchased at Data Center Solution Configurator. Make sure to include the Foot-release brake and the Load Platform when ordering the Genie Lift GL-8 material lift.
- A torque screwdriver is available for request if you do not have one at hand.
Note
Make sure you have the required tools listed below available to properly replace the component:
- Torx T15 head screwdriver
Procedure
- Set the screwdriver to 0.2±0.02 newton-meters, 1.77±0.177 inch-pounds and unfasten the two Torx T15 screws to remove the HMC card from the GPU baseboard.Figure 1. HMC card removal for H100/H200
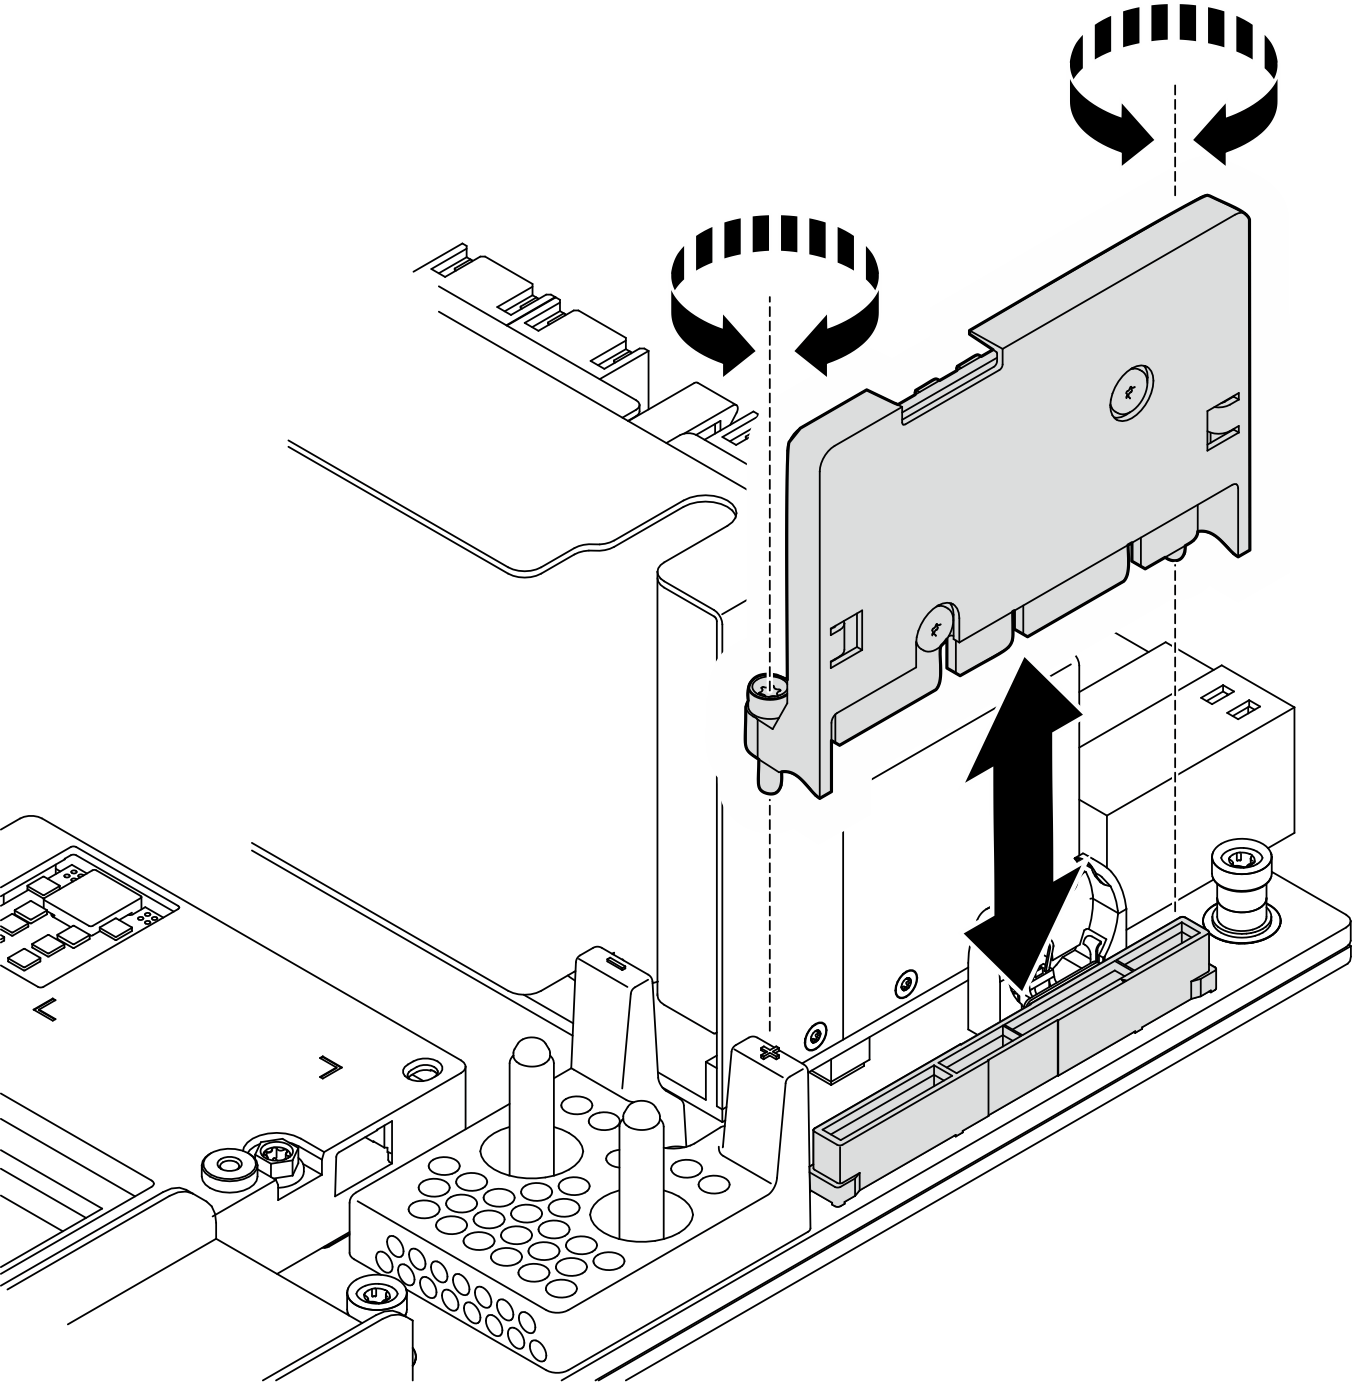 Figure 2. HMC card removal for B200
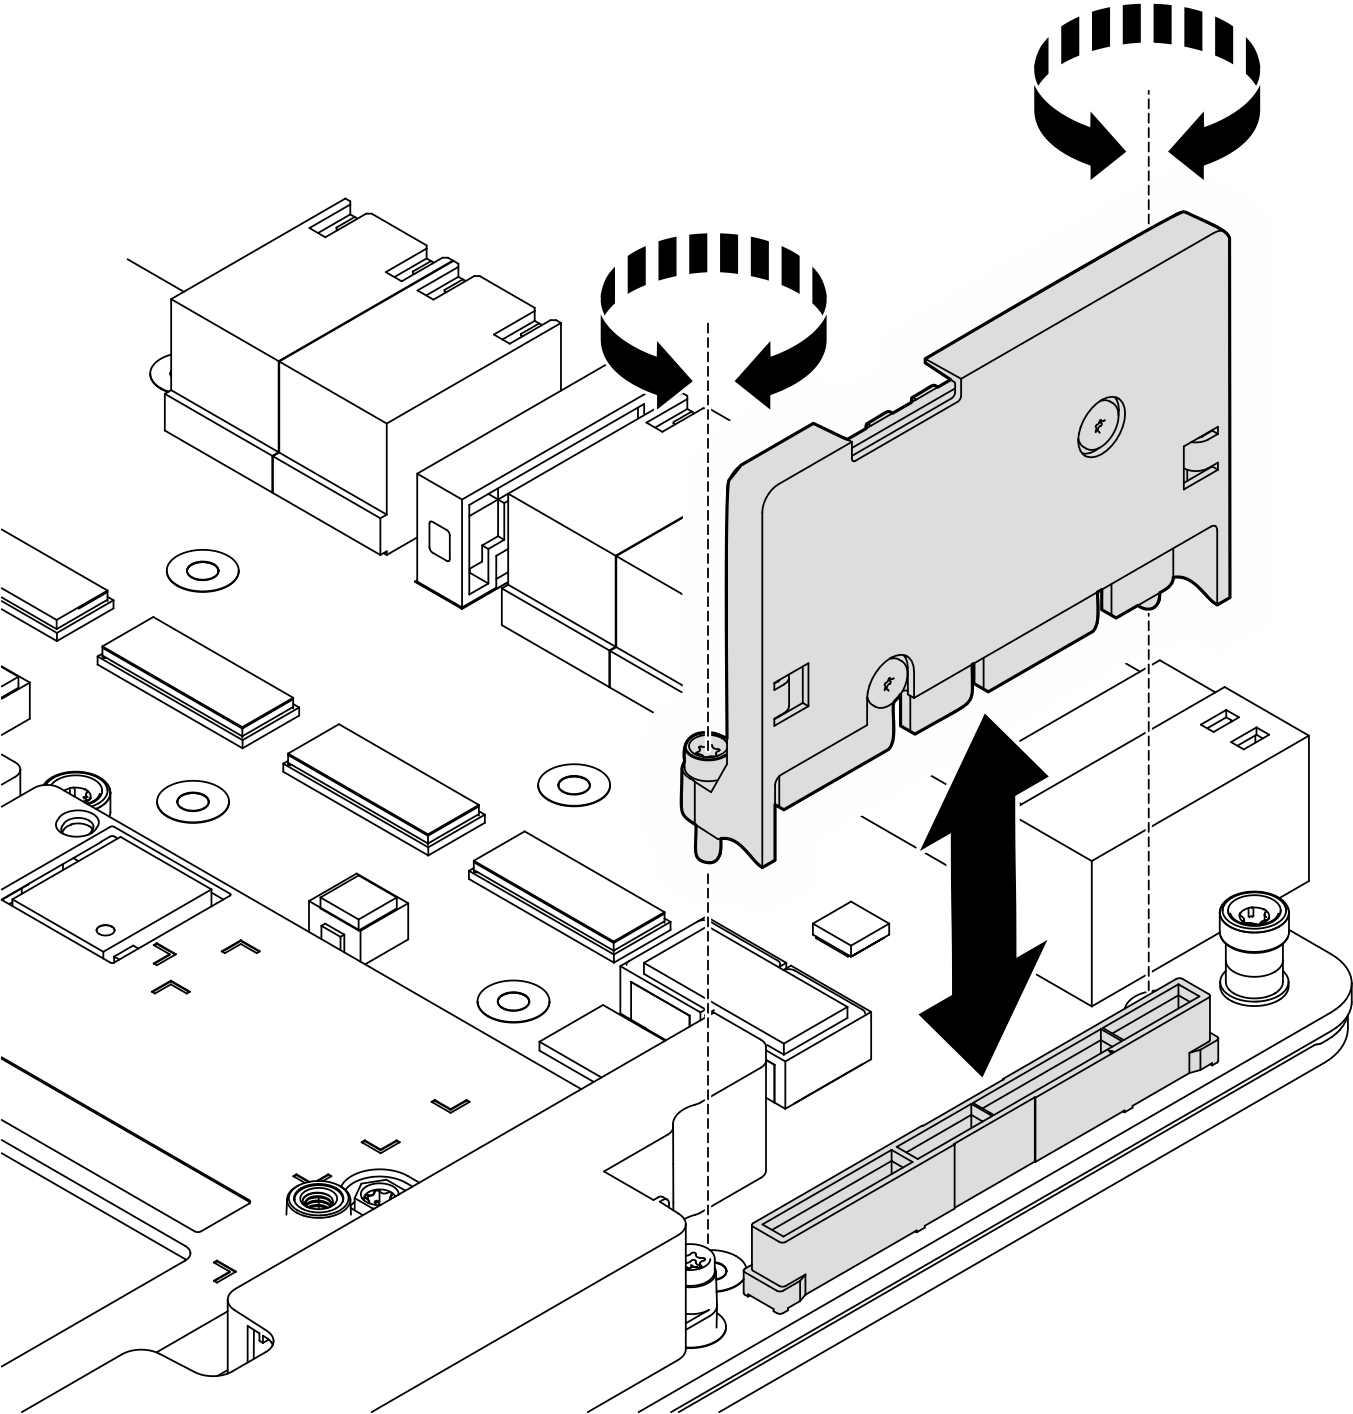
After you finish
- Install a replacement unit. See Install the HMC card.
- If you are instructed to return the component or optional device, follow all packaging instructions, and use any packaging materials for shipping that are supplied to you.
Give documentation feedback