Resize a vDisk
Infrastructure admin users and VDC manager users can increase the size of a virtual disk that is available for an application instance.
Complete the following steps to resize a vDisk:
- Expand the VDC that contains the application instance and click VDC Instances.Figure 1. VDC instances page

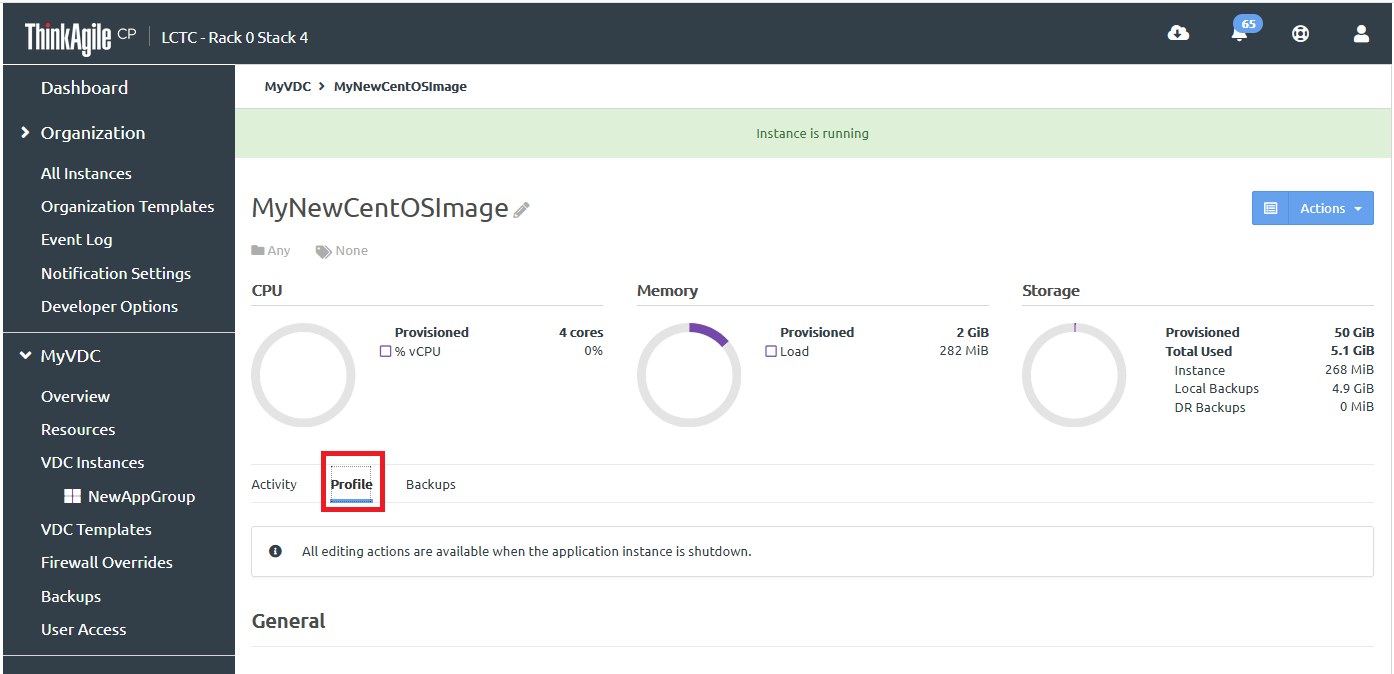
- Click the application instance to display the details for that instance. Then click the Profile tab.Figure 2. Profile tab
- Scroll down to the Storage section and click the Actions menu (
 ) for the vDisk to be resized. Then click Edit size.Figure 3. Actions menu
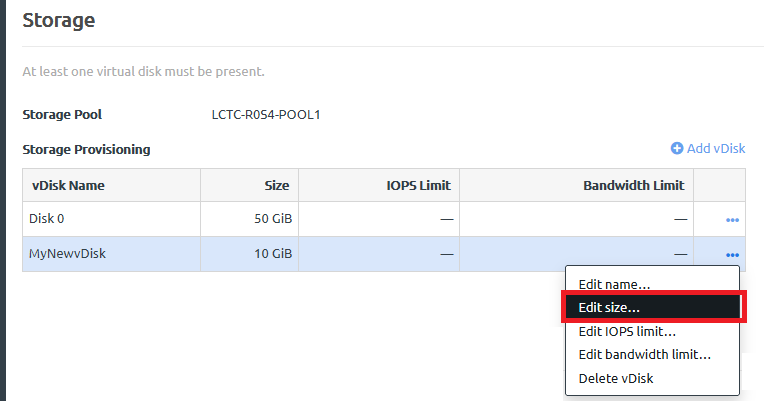
After resizing a vDisk for Windows
- Establish a console session with the Windows instance, and open Disk Management. The disk that was resized will show in Unallocated space.
- Complete the following steps to create a new volume in the Unallocated space:
- Right-click the Unallocated space and select New Simple Volume.
- Click Next and enter the volume size.
- Click Next and assign a drive letter to the new volume.
- Click Next, select formatting options, and assign a volume label.
- Click Next and Finish.
Complete the following steps to extend the current volume into the Unallocated space:
- Right-click the volume and select Extend Volume.
- Click Next and enter the amount of space to add to the volume.
- Click Next and Finish.
Verify the partition is aligned and realign it if necessary:
- Open System Information (msinfo32).
- Click .
- For each disk, make note of the size in bytes, the partition size in bytes, and the partition starting offset in bytes.
- Check for misalignment:
- If you have multiple partitions, add the Partition Size (bytes) to the Partition Starting Offset (bytes). Subtract this value from the Partition Starting Offset (bytes) of the subsequent partition. You should get either 0 or a positive number.
- For the last partition on the disk, add the Partition Size (bytes) to the Partition Starting Offset (bytes). Subtract this value from the disk Size (bytes). You should get either 0 or a positive number.
- If you get a negative number for either of these, it means your partition is misaligned by that number of bytes: it's either overlapping another partition or it ends beyond the end of the disk.
Shrink the volume if necessary:
- Open Disk Management.
- For each partition that is misaligned, right click on it and select Shrink. Shrink the volume by the amount by which it's misaligned or more. That is, take the negative number you calculated in the previous step and divide it by 1,048,576 to get the size in MB, then shrink the volume by at least that amount.
After resizing a vDisk for Linux
- Establish a console session with the Linux instance.
- Create a new ext4 partition /dev/sdb2 on disk /dev/sdb:
Check how many drives are installed:
fdisk -l | grep '^Disk'
Add a partition to the disk:
fdisk /dev/sdb
- Type p to use the partitioner, type n to create a new partition, and select your preferred settings when prompted.
- Type w to save the partition.
Format the disk:
mkfs.ext4 /dev/sdb2
Create a mount point and mount the partition:
mkdir /disk2
mount /dev/sdb2 /disk2
Edit fstab so the new partition automatically mounts to /disk2 on reboot:
vi /etc/fstab
- Type i to edit the file.
Add the followoing line:
/dev/sdb2 /disk2 ext4 defaults 1 2
- Enter ESC and type :wq to write the changes and save the file.
- To expand an existing ext4 partition /dev/sdc1 on disk /dev/sdc that's mounted to /disk3:
Unmount the partition:
umount /disk3
Expand the partition by deleting and recreating it without deleting the data:
fdisk /dev/sdc
- Print the current partitions: p
- Delete the partition: d
- If multiple partitions are present, select the desired partition when prompted.
- Recreate the partition:
Type p to use the partitioner, n to create a new partition, and select your preferred settings when prompted.
- Type w to save the partition.
Expand the ext4 filesystem:
resize2fs /dev/sdc1