Install a HL PCIe adapter
Follow the instructions in this section to install a half-length (HL) PCIe adapter.
About this task
Read Installation Guidelines and Safety inspection checklist to ensure that you work safely.
Power off the server and disconnect all power cords for this task. See Power off the server.
Prevent exposure to static electricity, which might lead to system halt and loss of data, by keeping static-sensitive components in their static-protective packages until installation, and handling these devices with an electrostatic-discharge wrist strap or other grounding system.
- Depending on the specific type, the PCIe adapter might look different from the illustration in this section.
- Use any documentation that comes with the PCIe adapter and follow those instructions in addition to the instructions in this topic.
Nine PCIe slots are available in this server. To install one or more new PCIe adapters, follow the below-listed rules and priority for PCIe slots:
To replace an existing PICe adapter, skip to the procedure of installation: Installation procedure of a HL PCIe adapter
For the location of each of the PCIe slots and related connectors on the system board, see System board connectors.
For the installation procedure of a full-length GPU adapter, see Install a FL GPU adapter.
PCIe installation rules with one processor
| Rules and priority for PCIe slots with one processor |
|---|
When only one processor is installed, PCIe slots 1 to 4 and 9 are supported. Listed by priority:
|
PCIe installation rules with two processors
| Rules and priority for PCIe slots with two processors |
|---|
With two processor installed, all 9 PCIe slots are supported. Listed by priority:
|
GPU installation rules
| GPU installation rules |
|---|
|
Installation procedure
- For the 9450-8i, 5450-16i, 9450-16i, and 4450-16i PCIe adapters, make sure to install x8 or x16 PCIe slot holder onto the PCIe connector.x8 PCIe slot holderFigure 1. x8 PCIe slot holder
 x16 PCIe slot holder
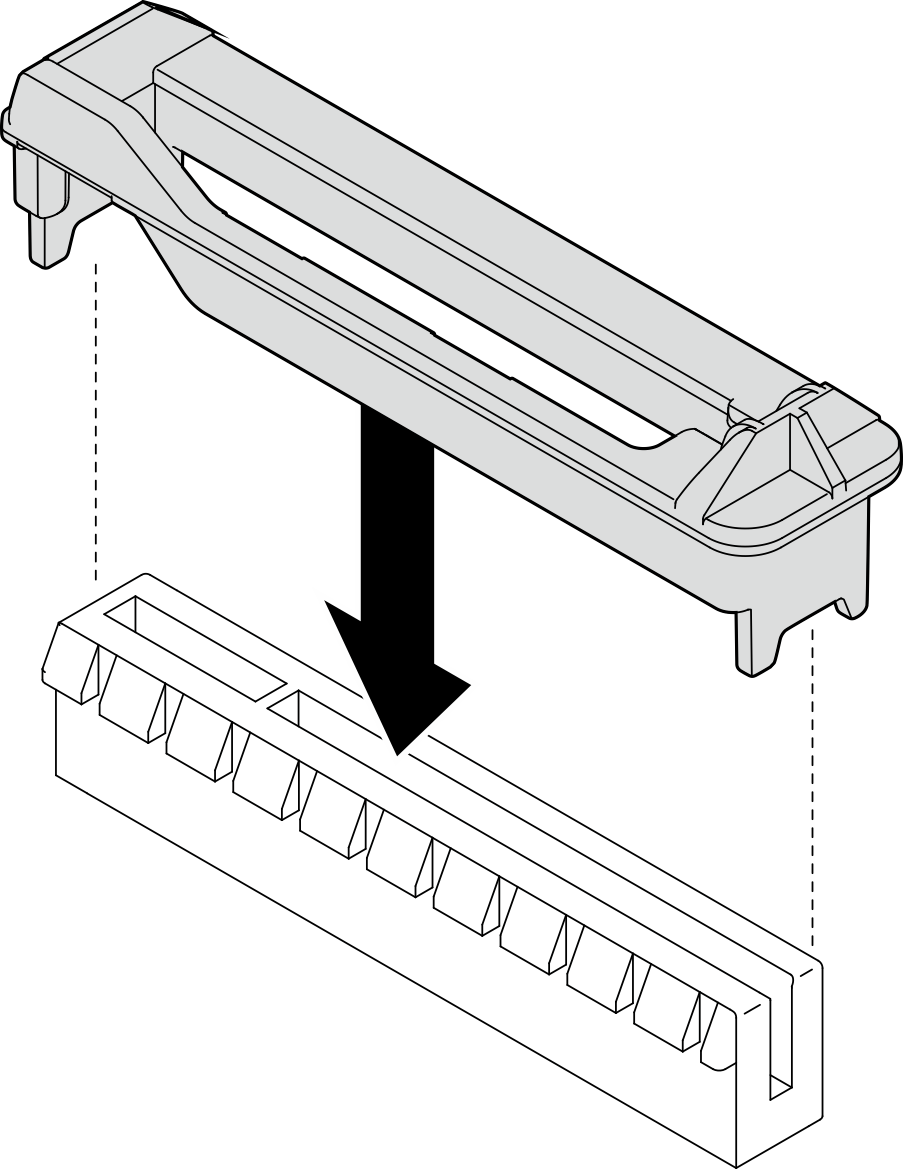
 Hold the latch on the plastic filler; then, remove the plastic filler from the PCIe slot holder.
 Align the PCIe slot holder with the PCIe connector on the system board; then, install the PCIe slot holder onto the PCIe connector.Figure 2. x16 PCIe slot holder
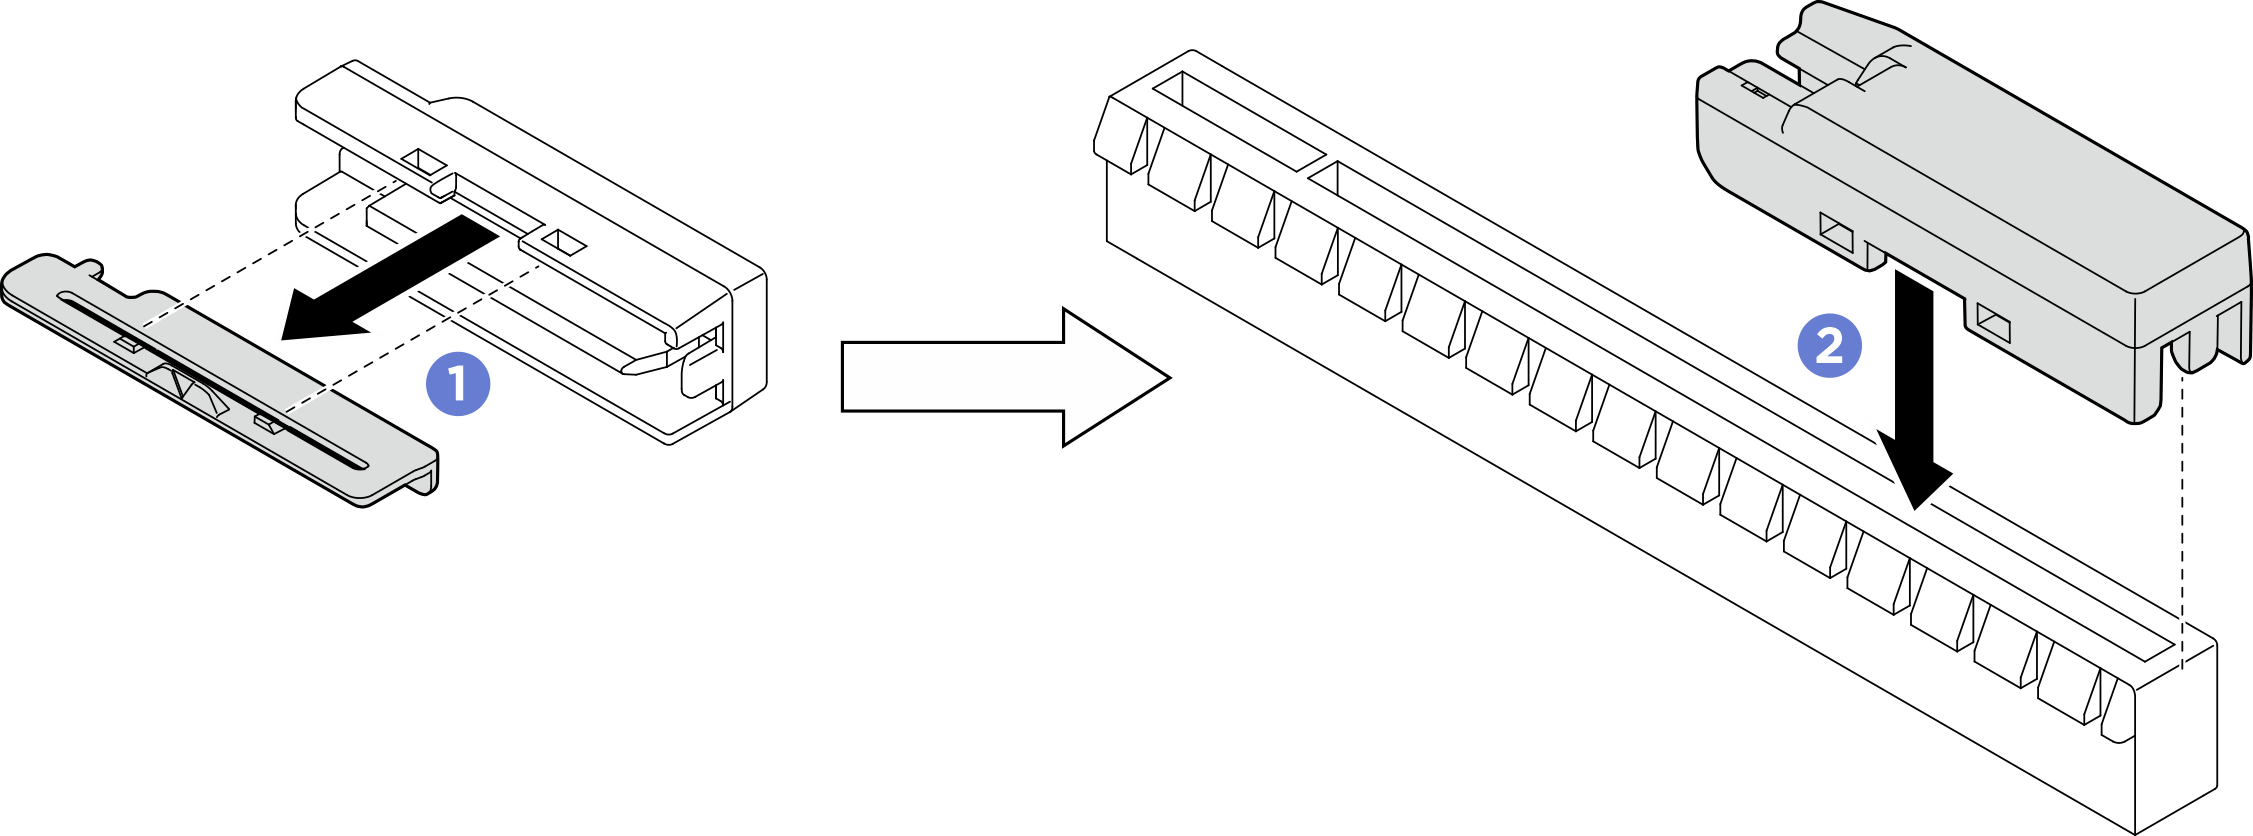
- Install the PCIe adapter.Note
Make sure that the PCIe adapter retainer is in the open position.
- Align the PCIe adapter to the PCIe slot; then, gently press both ends of the PCIe adapter until it is securely seated in the PCIe slot.
- Tighten the screw to secure the PCIe adapter.
 Close the PCIe adapter retainer.Figure 3. Installation of a HL PCIe adapter
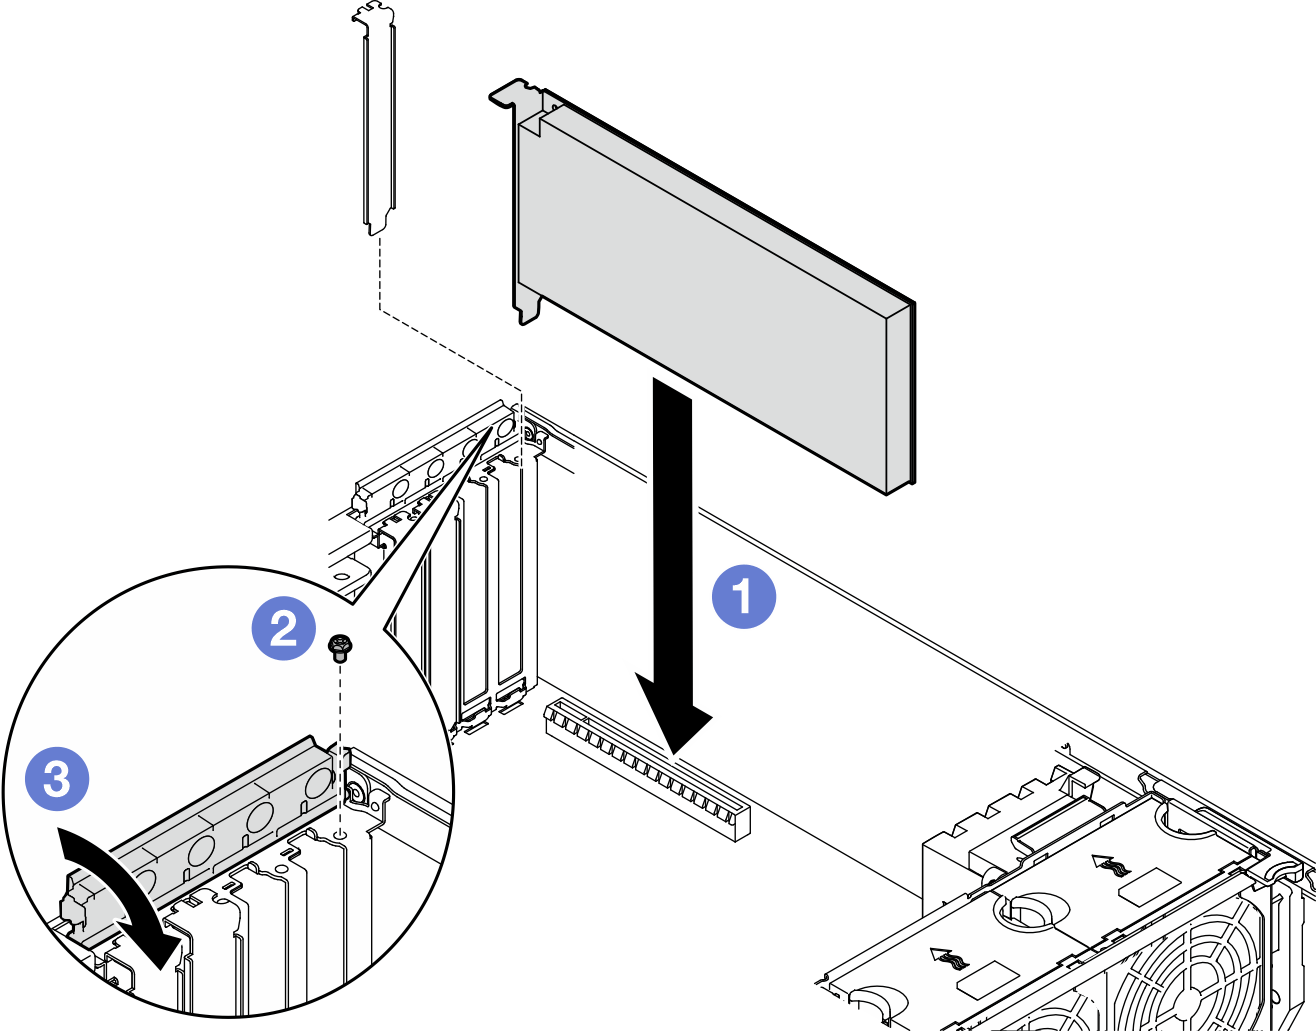
After you finish
Connect all required cables to the PICe adapter. See Internal cable routing.
If the fan cage and fans are not installed in the chassis, reinstall them. See Install the fan cage assembly and Install a fan module.
- If one or more A2/L4 GPU adapters are installed, install one ore two A2/L4 GPU air ducts to the corresponding slot on the fan cage, and install a T4 filler to the server cover. See Install an A2/L4 GPU air duct and Install a T4 filler.
Reinstall the air baffle. See Install an air baffle.
Reinstall all the flash power modules, if necessary. See Install a flash power module.
Reinstall the server cover. See Install a server cover.
Complete the parts replacement. See Complete the parts replacement.
Demo video