Removing the front USB connector assembly cable
Note
The server configuration you have bought may either have the front USB connector assembly inside the media cage or on the side of the server.
To remove the front USB connector assembly cable that is inside the media cage, complete the following steps:
- Read the safety information that begins in Safety and Installation guidelines.
- Turn off the server (see Turning off the server) and all attached peripheral devices. Disconnect all power cords; then, disconnect all external cables as necessary to replace the device.
- Remove the server top cover (see Removing the server top cover).
- Remove the PCI riser-card assembly (see Replacing a PCI riser-card assembly).
- Remove the air baffle (see Removing the air baffle).
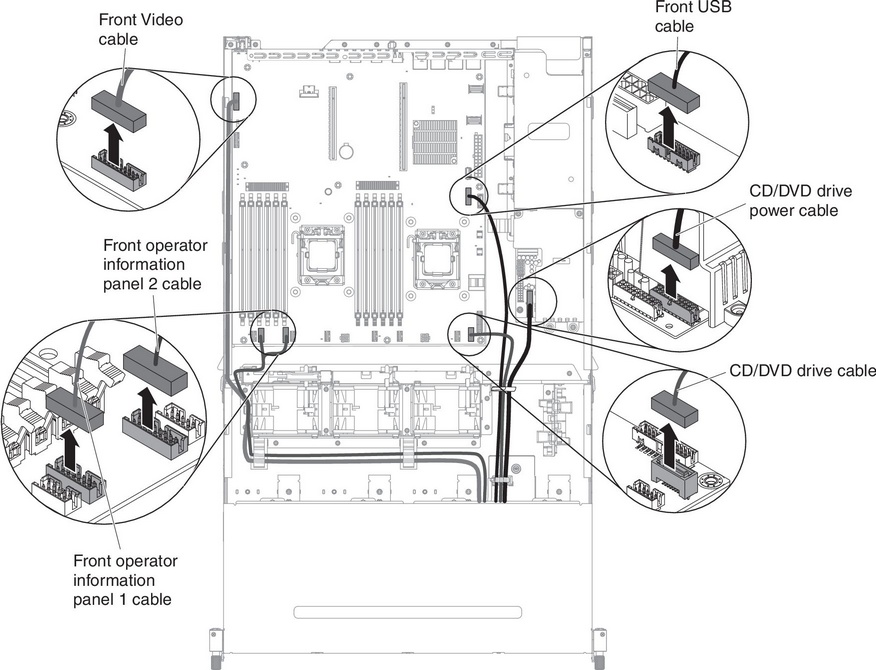
- Disconnect the USB, video, CD/DVD and operator information panel cables from the system board. Please remember the relevant cable routing.
- Loosen the single thumbscrew that is used to secure the media cage onto the server.

- Carefully pull the media cage out of the server.

- Locate the blue release tab on the rear of the USB and video connector assembly; then, while you press down on the tab, carefully pull the assembly outward.
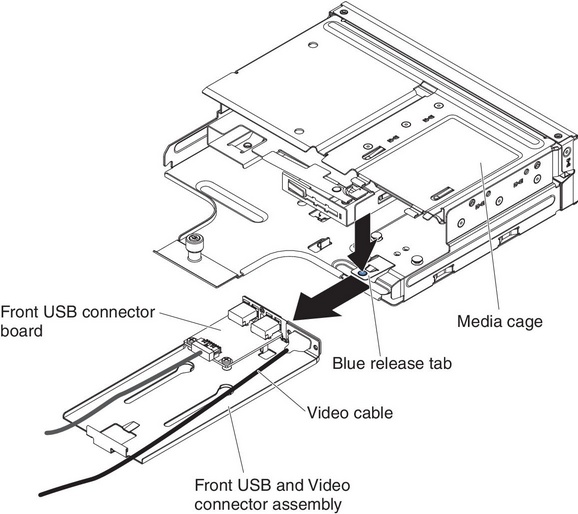
- Disconnect the USB cable from the connector on the front USB connector board.
- If you are instructed to return the front USB connector assembly, follow all packaging instructions, and use any packaging materials for shipping that are supplied to you.
To remove the front USB connector assembly cable that is on the side of the server, complete the following steps:
- Read the safety information that begins in Safety and Installation guidelines.
- Turn off the server (see Turning off the server) and all attached peripheral devices. Disconnect all power cords; then, disconnect all external cables as necessary to replace the device.
- Remove the server top cover (see Removing the server top cover).
- If you have the optional hot-swap rear hard disk drive cage installed, rotate it up (see Rotating the optional hot-swap rear hard disk drive cage up).
- Remove the PCI riser-card assembly (see Replacing a PCI riser-card assembly).
- Remove the air baffle (see Removing the air baffle).
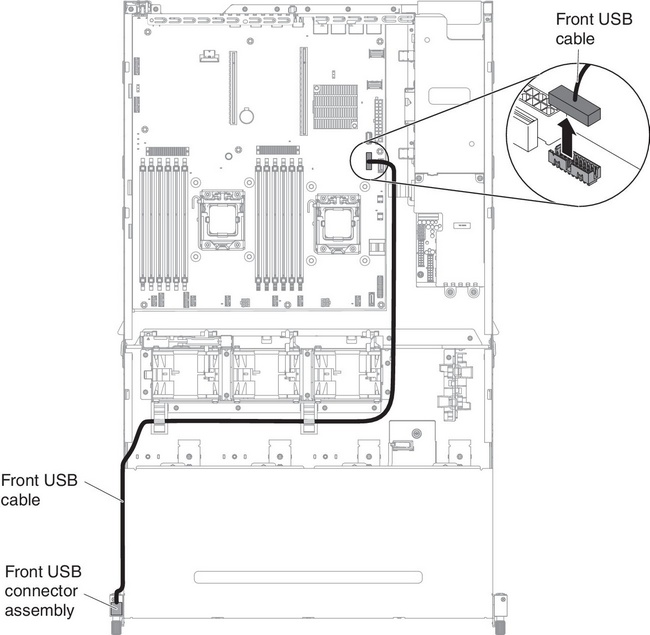
- Make note of where the front USB connector assembly cable is attached to the system board; then, disconnect it.
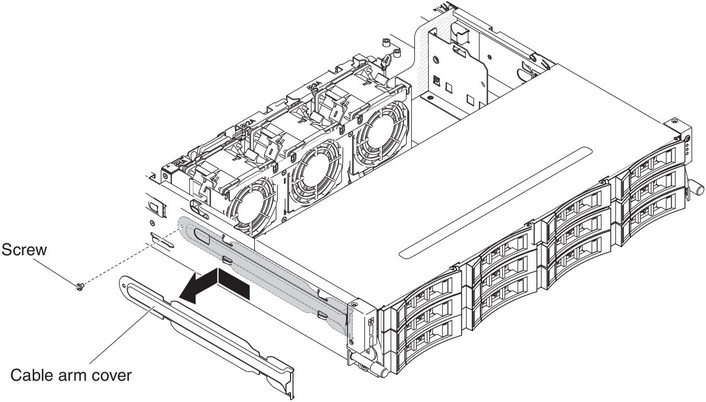
- Remove the screws from the cable arm cover; then, slide the cable arm cover towards the rear of the server and set it aside.
- Remove the screws from the front USB connector assembly.
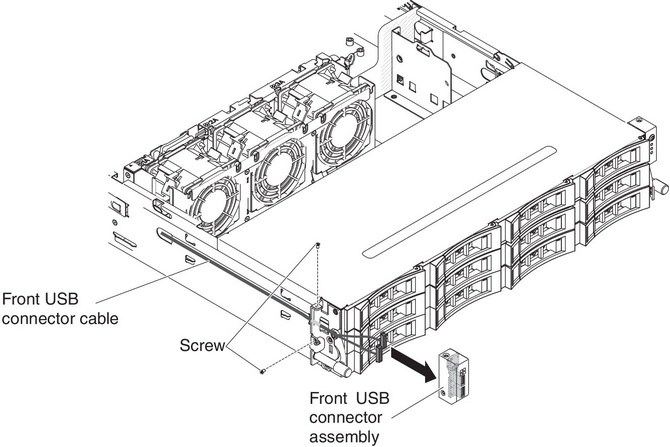
- Disconnect the cable to the front USB connector assembly.
- If you are instructed to return the front USB connector assembly cable, follow all packaging instructions, and use any packaging materials for shipping that are supplied to you.
Give documentation feedback