Removing the hot-swap hard disk drive backplane
Use this information to remove the hot-swap hard disk drive backplane.
To remove the hot-swap hard disk drive backplane, complete the following steps:
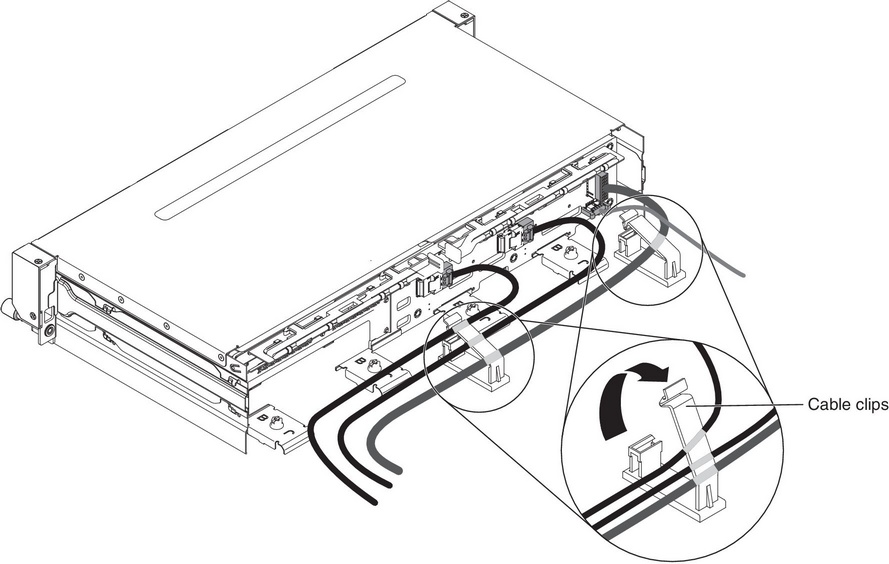
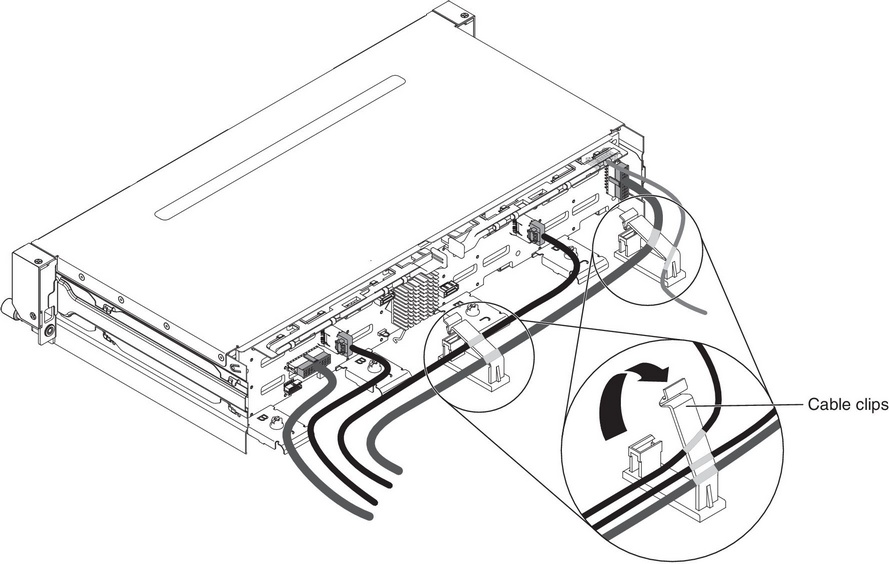
- Open the two cable retainer clips behind the fan cage to release the cabling.Note
- Based on the server configuration, the hot-swap hard disk drive backplane may appear as either of the following.
- You can refer to the internal cable routing section Internal cable routing for further details.
For eight 3.5-inch hot-swap drive backplane:
For twelve 3.5-inch hot-swap drive backplane:
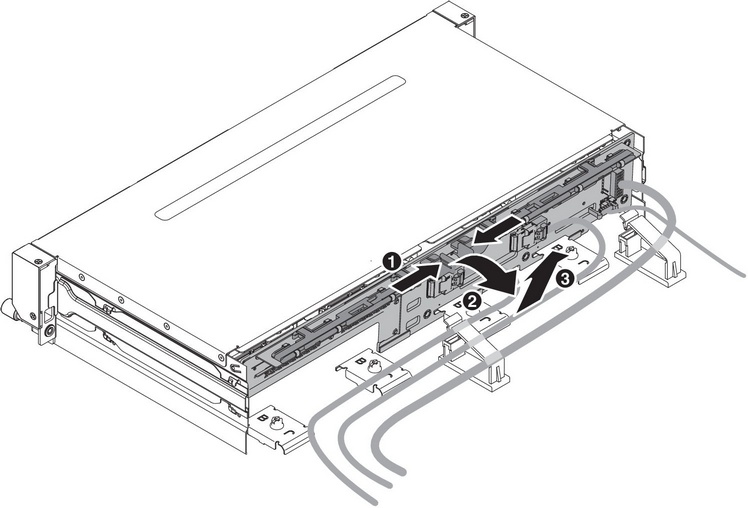
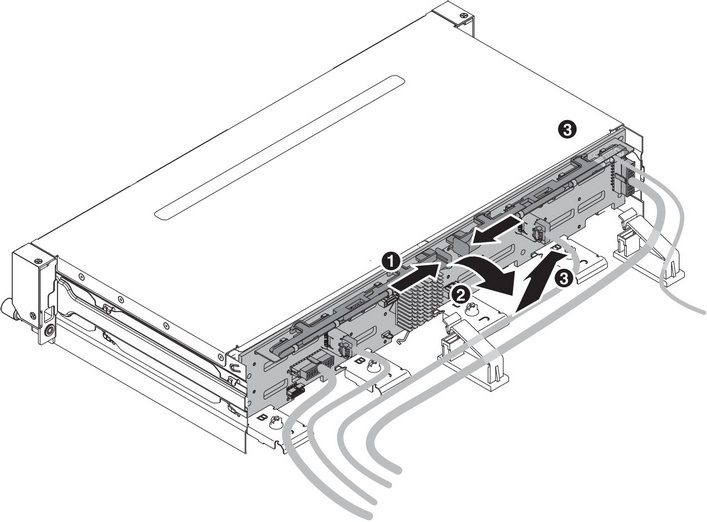
- Press the release latches and rotate out the top of the backplane; then, slightly lift the backplane out of the server by pulling outwards and lifting it up.NoteBased on the server configuration, the hot-swap hard disk drive backplane may appear as either of the following.
For eight 3.5-inch hot-swap drive backplane:
For twelve 3.5-inch hot-swap drive backplane:
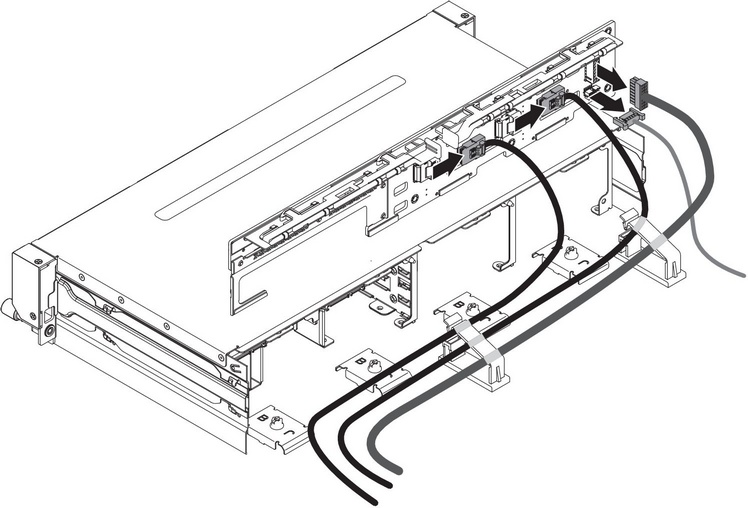
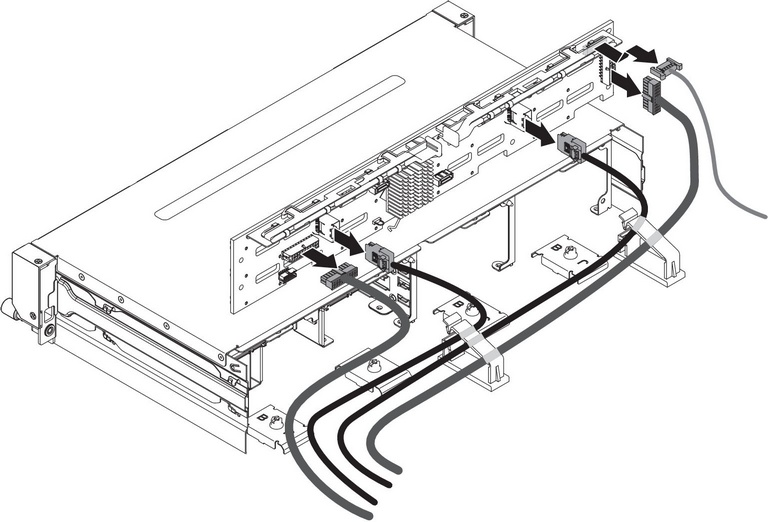
- Make note of where the power cable and signal cables are attached to the backplane; then, disconnect them.NoteBased on the server configuration, the hot-swap hard disk drive backplane may appear as either of the following.
For eight 3.5-inch hot-swap drive backplane:
For twelve 3.5-inch hot-swap drive backplane:
Give documentation feedback