Replacing the hot-swap backplane in the optional rear hard disk drive cage
Use this information to replace the hot-swap backplane in the optional rear hard disk drive cage.
To install the replacement hot-swap backplane in the optional rear hard disk drive cage, complete the following steps.
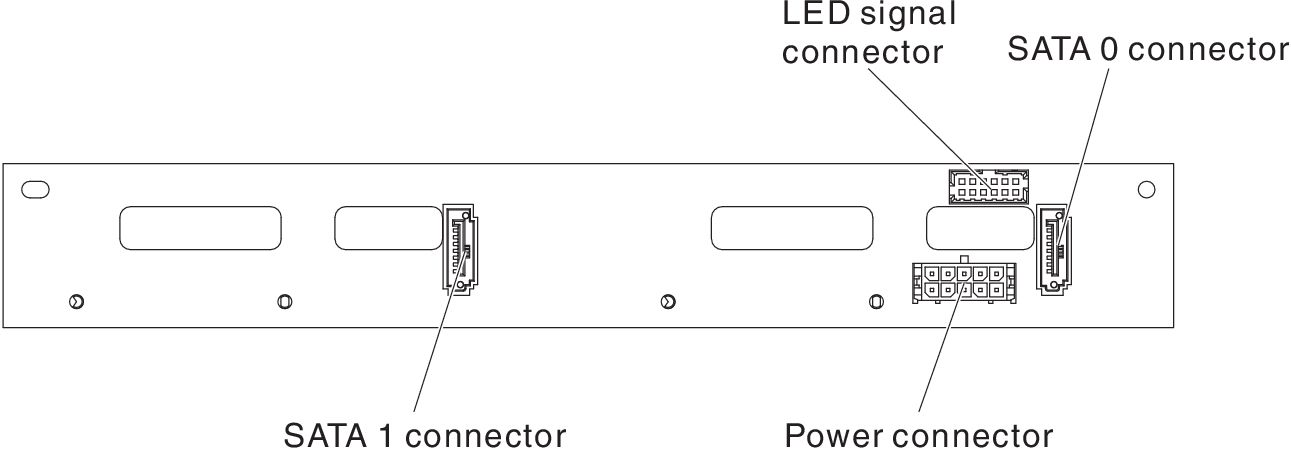
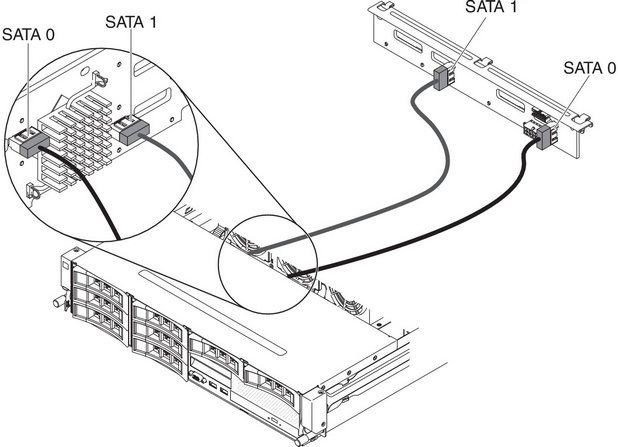
- Reconnect the LED signal, SATA signal and power cables to the backplane.NoteMake sure that Port 1 is connected to Port 1 for both backplanes. Likewise, Port 0 is connected to Port 0 for both backplanes.
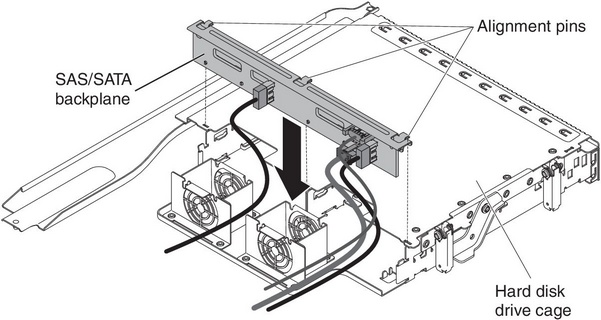
- Lower the backplane into the optional rear hard disk drive cage. Make sure the three alignment pins securely engages the three holes on the hard disk drive cage.
Give documentation feedback