Removing the front video connector
Use this information to remove the front video connector .
To remove the front video connector, complete the following steps:
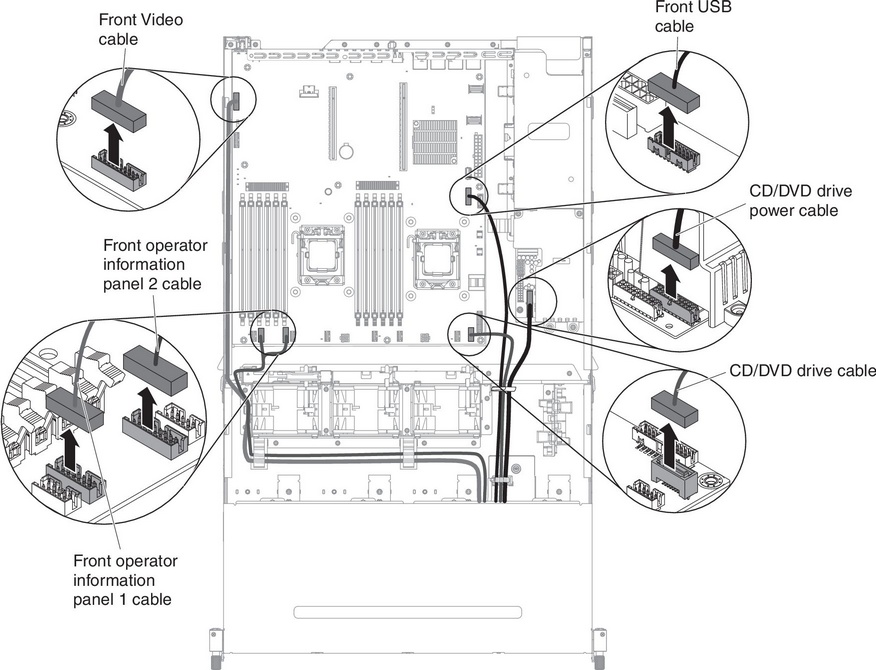
- Disconnect the USB, video, CD/DVD and operator information panel cables from the system board. Please remember the relevant cable routing.
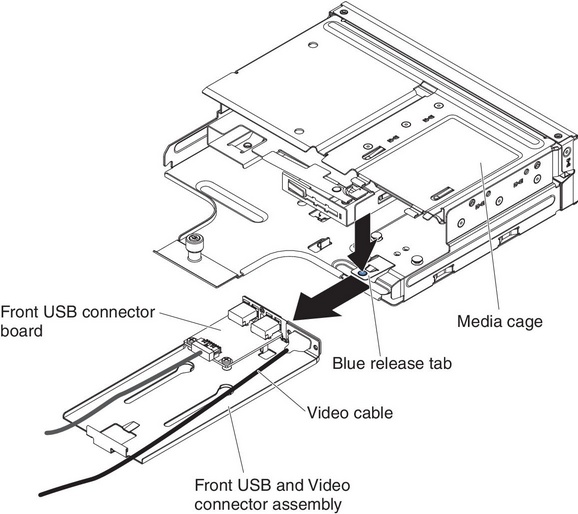
- Loosen the single thumbscrew that is used to secure the media cage onto the server.

- Carefully pull the media cage out of the server.

- Locate the blue release tab on the rear of the USB and video connector assembly; then, while you press down on the tab, carefully pull the assembly outward.
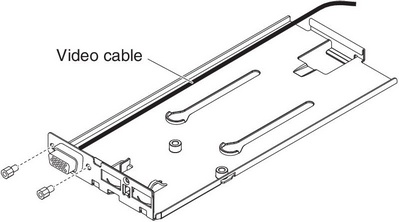
- Loosen the screws that secure the video connector to the front USB and video connector assembly.
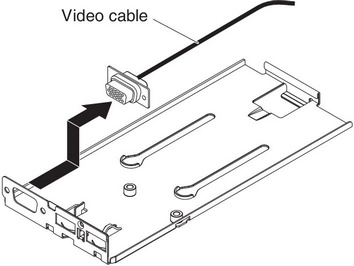
- Remove the video connector and cable from the server.
Give documentation feedback