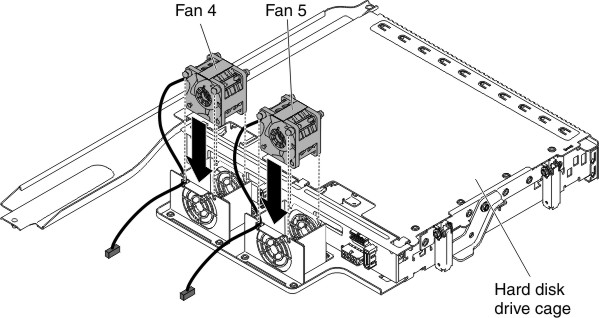
Replacing the system fan in the optional hot-swap rear hard disk drive cage
Use this information to replace the system fan in the optional hot-swap rear hard disk drive cage.
Note
The system fans in the optional hot-swap rear hard disk drive cage are used for system boards that support Intel Xeon Processor E5-2600 V2 series.
To install the replacement system fan in the optional hot-swap rear hard disk drive cage, complete the following steps.
- Lower the fan into the fan slot in the server and ensure that is it seated correctly.
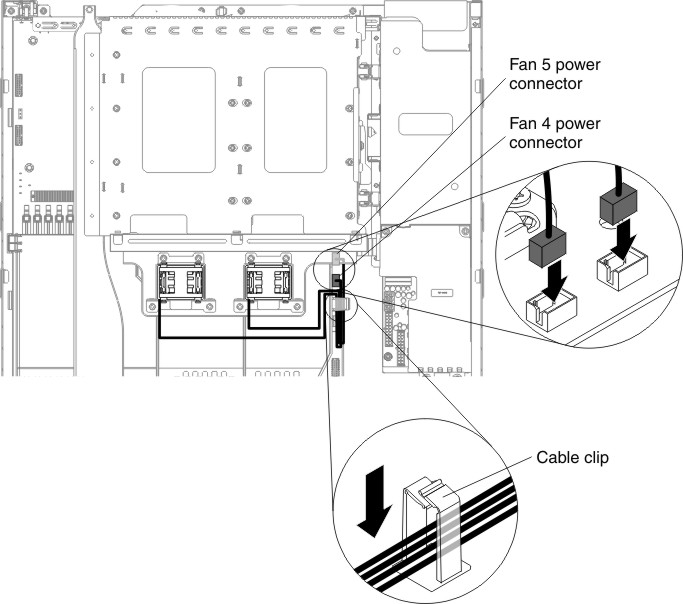
- Connect the system fan cable to the connector on the system board.NoteRemember to insert the excess cabling into the cable clip, as shown in the following illustration.
Give documentation feedback