
Replacing a PCI riser-card assembly

Use this information to replace a PCI riser-card assembly.

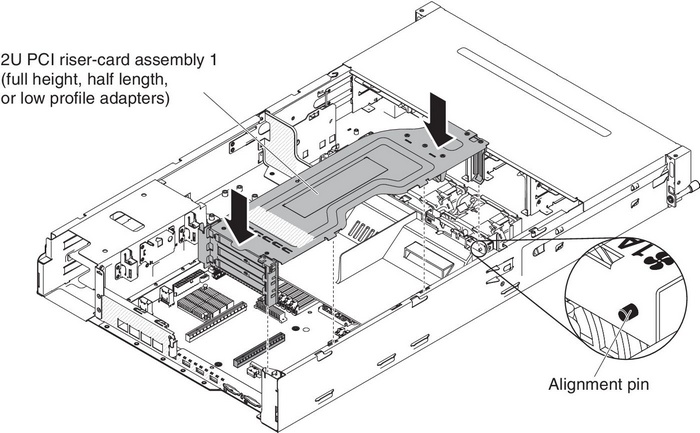
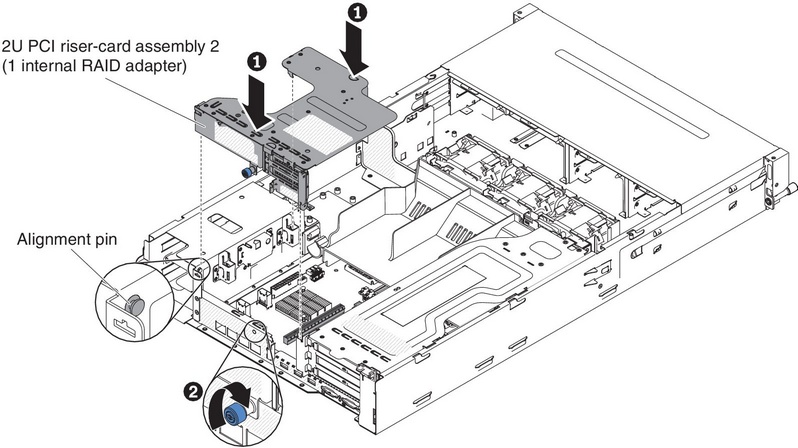
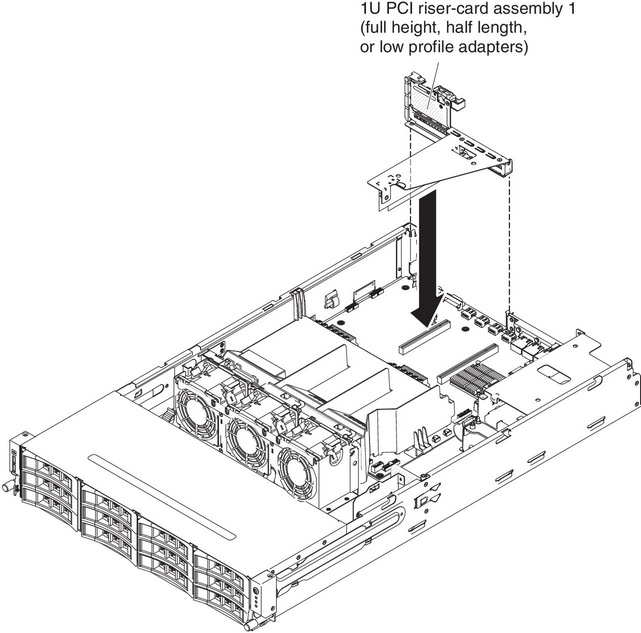
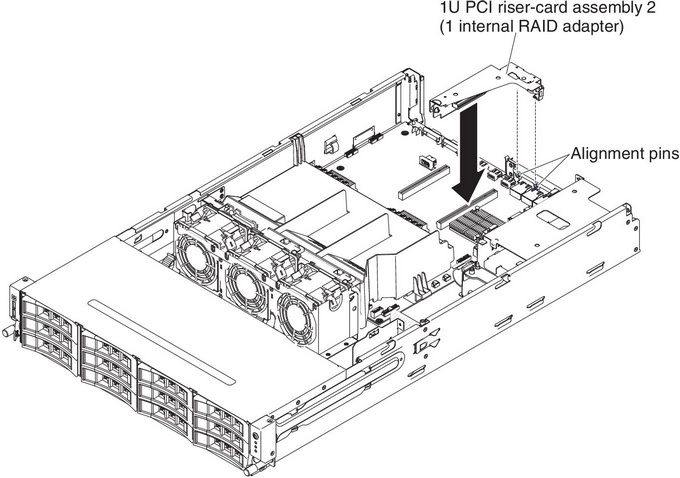
To replace the PCI riser-card assembly, complete the following steps:

  1. Read the safety information that begins in Safety and Installation guidelines.
  2. Make sure that the server and all peripheral devices are turned off and that the power cords and all external cables are disconnected.
  3. Reinstall any adapters and reconnect any internal cables that you removed in other procedures.
  4. Align the PCI riser-card assembly with the PCI riser connector on the system board and guide pins on the server; then, press down on blue touch points on the PCI riser-card assembly to install the assembly in the server. Make sure that the PCI riser-card assembly is fully seated in the PCI connectors on the system board.

    For 2U riser card assemblies:


    For 1U riser card assemblies:


  5. If you have the optional hot-swap rear hard disk drive cage installed, rotate it down (see Rotating the optional hot-swap rear hard disk drive cage down).
  6. Install the server top cover (see Replacing the server top cover).
  7. Reconnect the external cables; then, reconnect the power cords and turn on the peripheral devices and the server.