
Replacing the simple-swap hard disk drive backplate

Use this information to replace the simple-swap hard disk drive backplate.

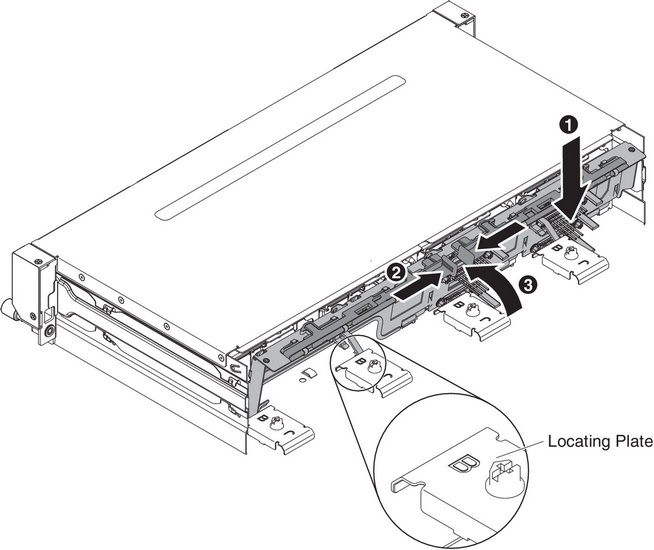
To install the replacement simple-swap hard disk drive backplate, complete the following steps:

  1. Read the safety information that begins in Safety and Installation guidelines.
  2. Align the backplate with the slot on the chassis.
  3. Lower the backplate into the server. Leave the backplate an angle of elevation so the backplate connectors will not get damaged. Make sure the locating plates securely engages the bottom of the backplate.
  4. Press the release latches; then, rotate the top of the backplate toward the front of the server until it locks into place.
    Note
    Make sure the backplate is engaged into place by the locating plates and that it is securely installed in the server.


  5. Reconnect the power cable and signal cables that you removed.
    Note
    You can refer to the internal cable routing section Internal cable routing for further details.
  6. Install the server top cover (see Replacing the server top cover).
  7. Reinstall the drives or filler panels.
  8. Reconnect the external cables; then, reconnect the power cords and turn on the peripheral devices and the server.