Install the M.2 boot adapter
Follow instructions in this section to install the M.2 boot adapter.
About this task
To avoid potential danger, read and follow the following safety statements.
- S002
 CAUTIONThe power-control button on the device and the power switch on the power supply do not turn off the electrical current supplied to the device. The device also might have more than one power cord. To remove all electrical current from the device, ensure that all power cords are disconnected from the power source.
Attention
Read Installation Guidelines and Safety inspection checklist to ensure that you work safety.
Touch the static-protective package that contains the component to any unpainted metal surface on the server; then, remove it from the package and place it on a static-protective surface.
Note
- Follow the rules below when a ThinkSystem M.2 SATA/x4 NVMe 2-Bay Enablement Kit is installed.
- Up to six 3.5-inch simple-swap SATA drives configured with software RAID is supported.
- Up to four 3.5-inch hot-swap SATA drives configured with software RAID is supported.
- 2.5-inch hot-swap SATA drives configured with software RAID and optical/tape drives are not supported.
Procedure
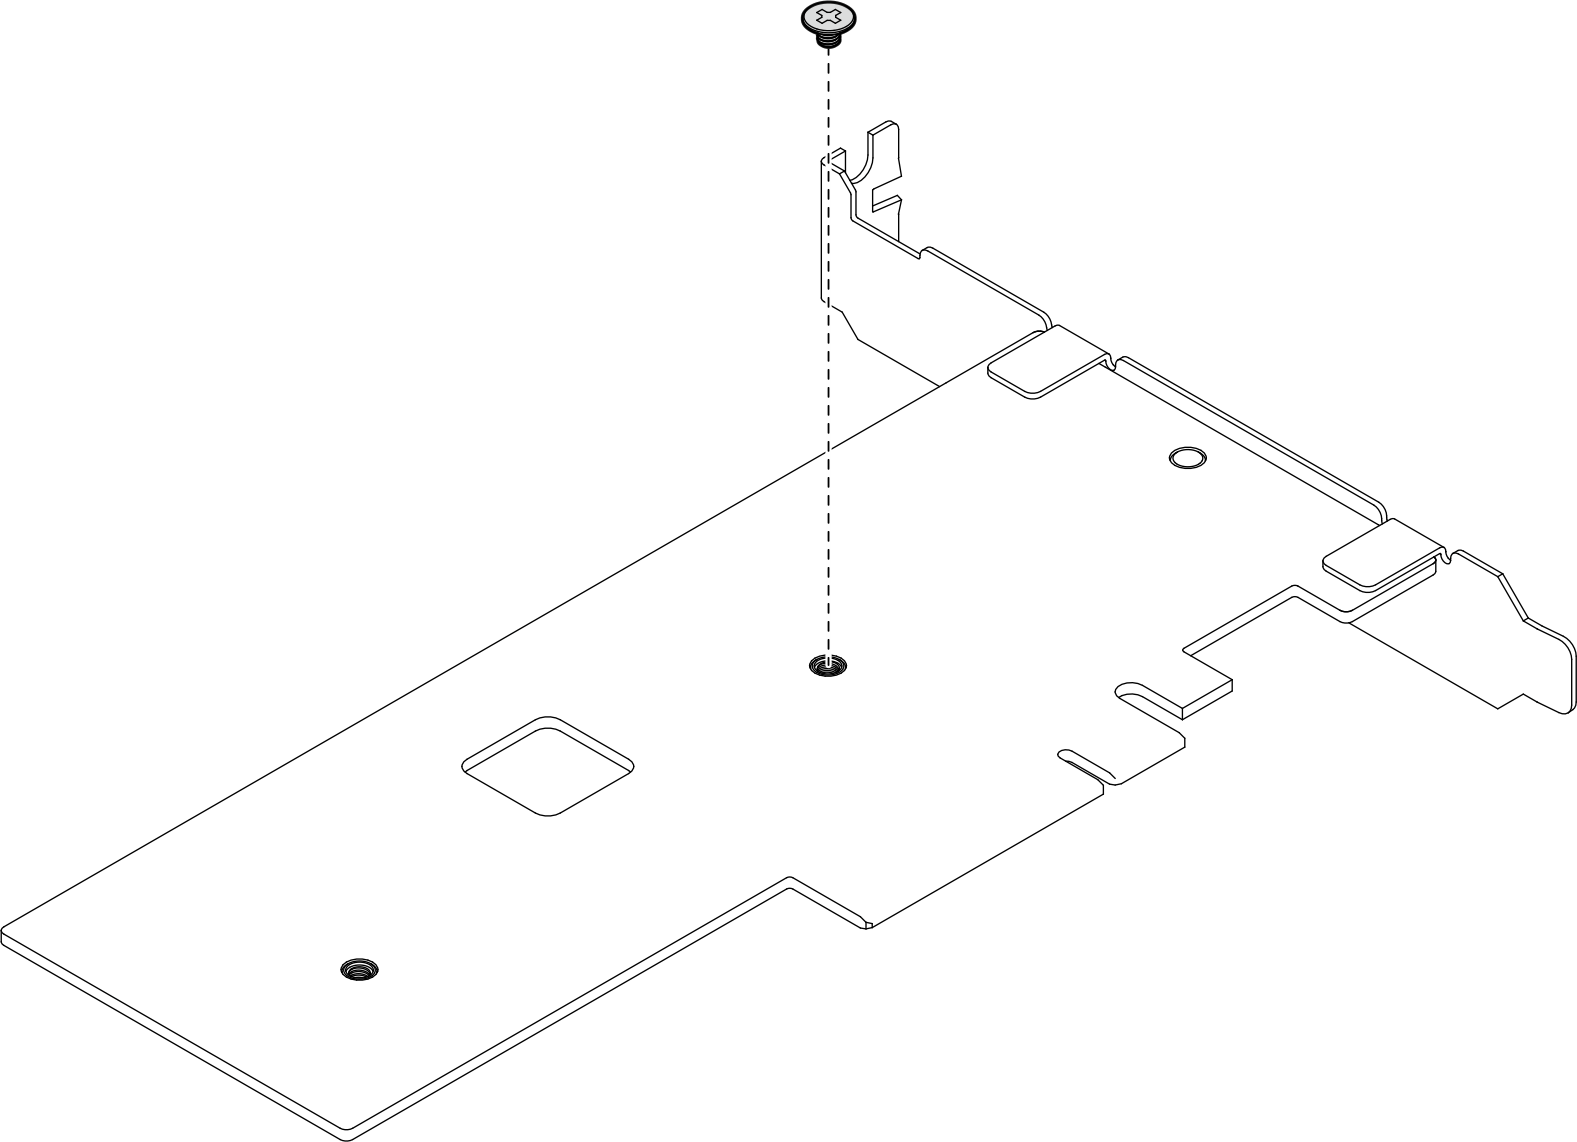
- Remove the screw on the back of the PCIe adapter.Figure 1. Removing the screw on the back of the PCIe adapter
- Secure the M.2 boot adapter to the PCIe adapter.
 Align the M.2 boot adapter with the T-head pin on the PCIe adapter as illustrated, and slide it into place.
 Tighten the captive screw on the M.2 boot adapter.
 Tighten the screw to secure the M.2 boot adapter to the PCIe adapter.
Figure 2. Securing the M.2 boot adapter to the PCIe adapter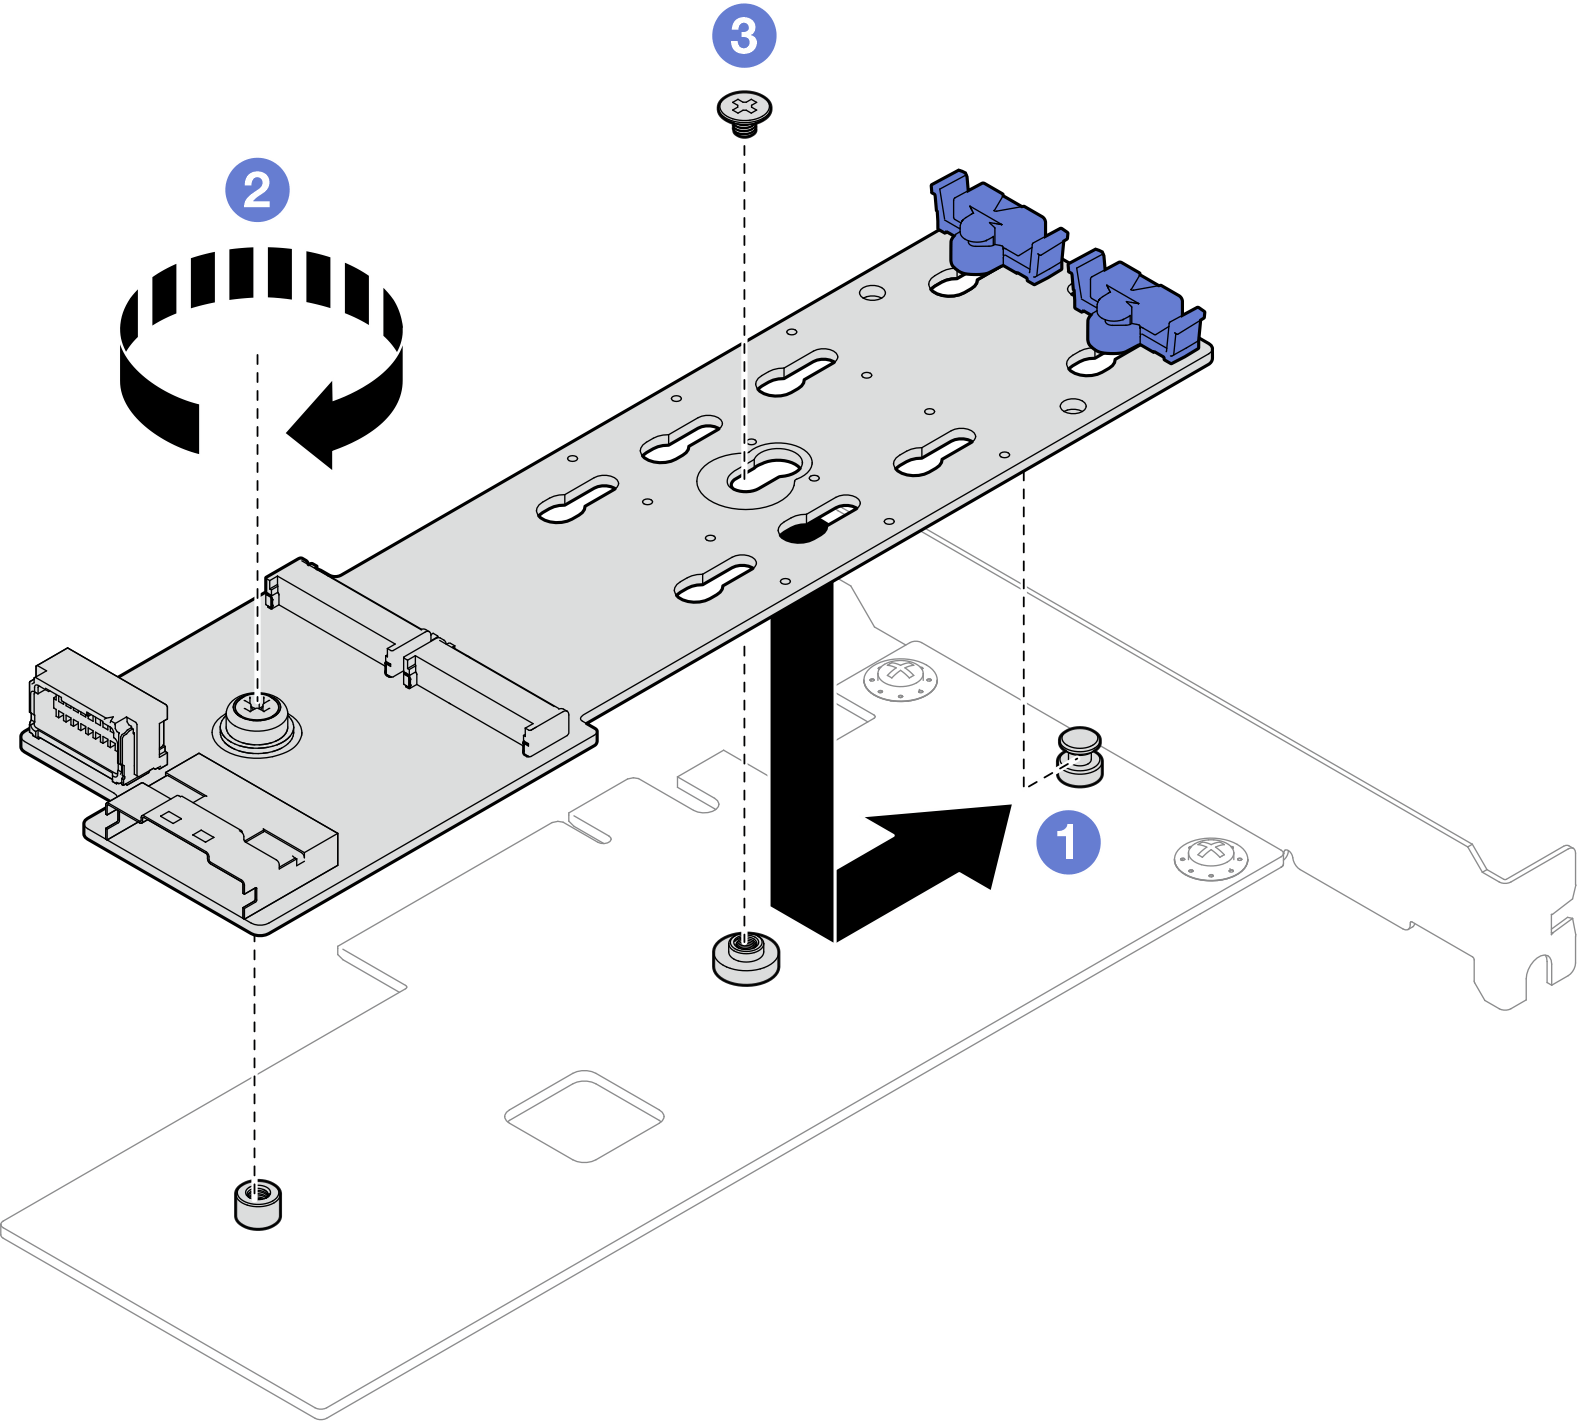
- Connect the cables to the M.2 boot adapter.Figure 3. Connecting cable to ThinkSystem M.2 SATA/x4 NVMe 2-Bay Enablement Kit
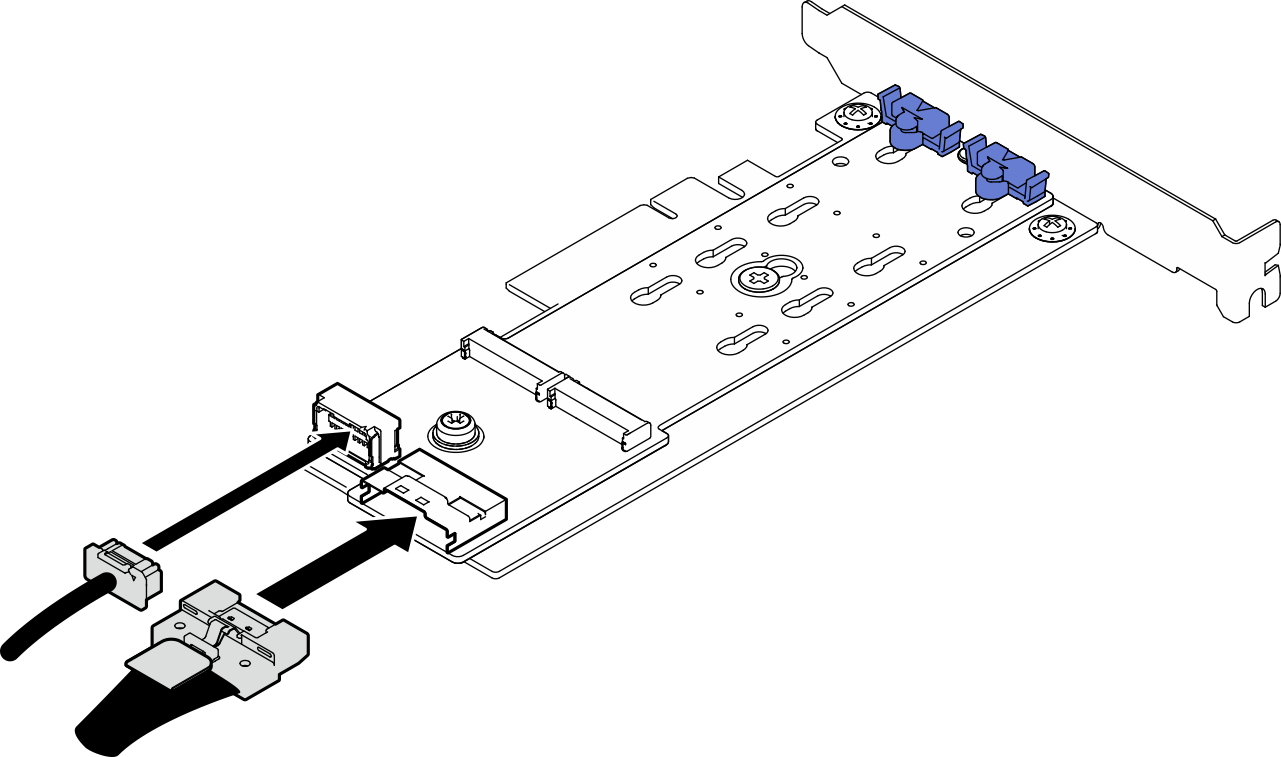 Figure 4. Connecting cable to ThinkSystem M.2 RAID B540i-2i SATA/NVMe Adapter
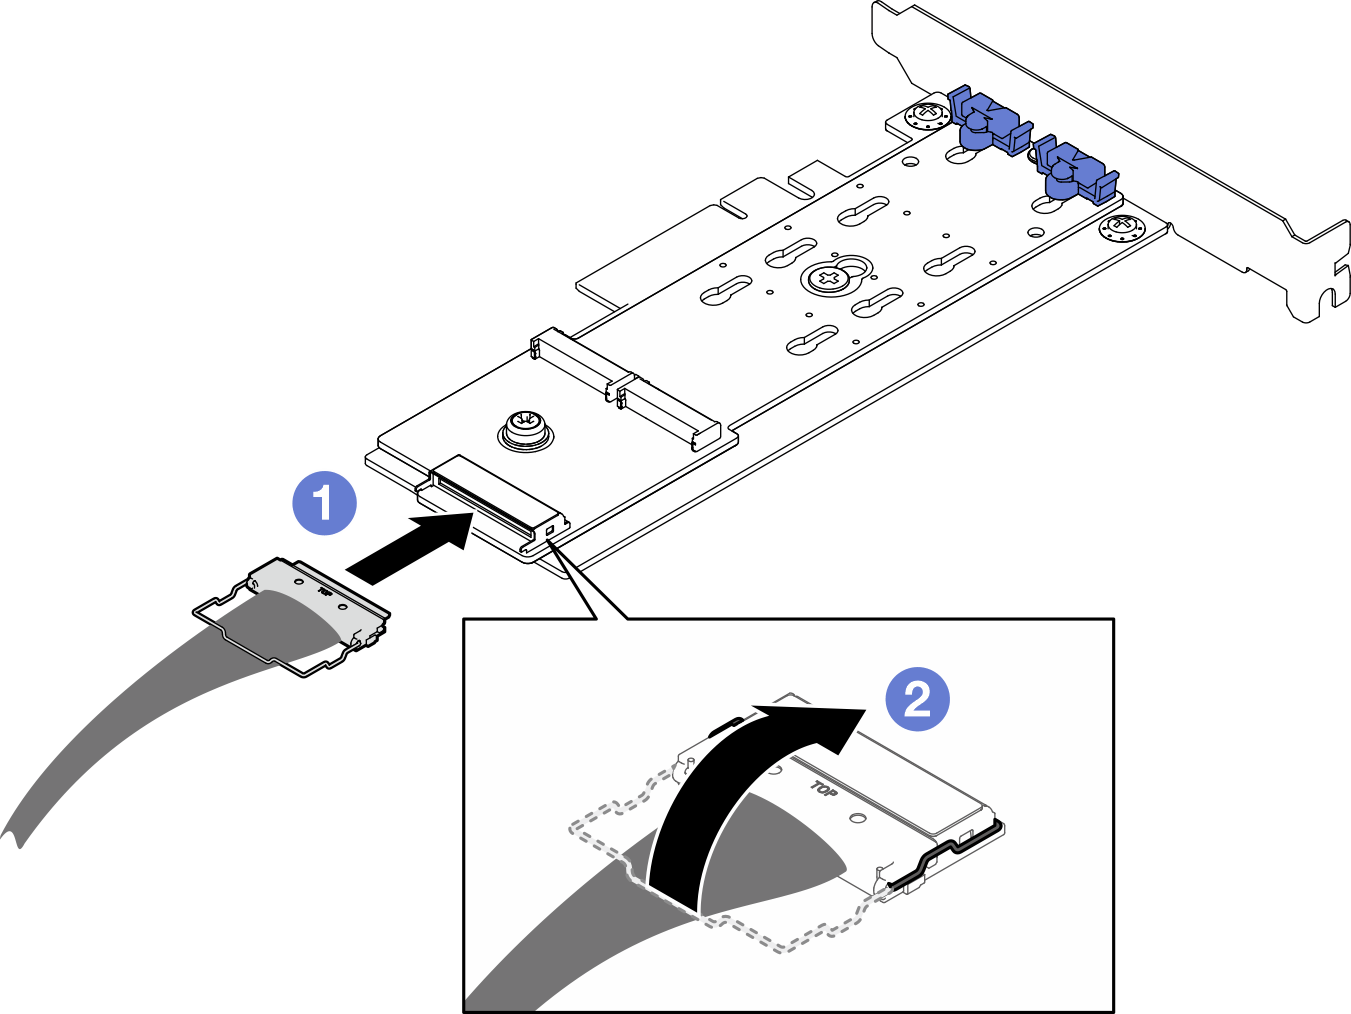
- Connect the cable to the M.2 boot adapter.
- Hook the wire bail on the cable onto the connector.
After you finish
Reinstall the M.2 drives to the M.2 boot adapter. See Install an M.2 drive.
- Install the PCIe adapter that secures the M.2 boot adapter. See Install the PCIe adapter.NoteThe M.2 boot adapter can only be installed in
PCIe slot 4. Connect the power cable and the signal cable to the system board. See M.2 adapter cable routing.
Install the server cover. See Install the server cover.
Complete the parts replacement. See Complete the parts replacement.
Demo video
Give documentation feedback