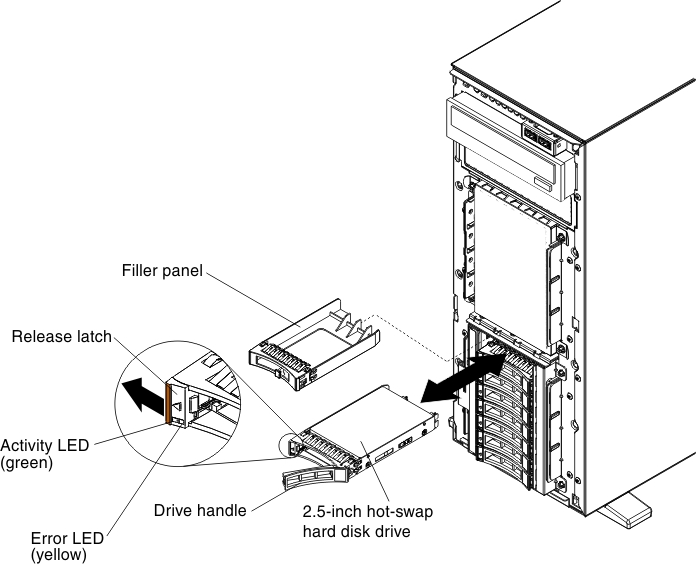
Removing a 2.5-inch hot-swap hard disk drive
Use this information to remove a 2.5-inch hot-swap hard disk drive.
The following notes describe the types of hard disk drives that the server supports and other information that you must consider when you install a hard disk drive:
- Depending on the model, the server supports up to eight or up to sixteen 2.5-inch SAS/SATA hot-swap hard disk drives in the hot-swap bays.NoteWhen using ServeRAID adapter M1015 to support more than sixteen 2.5-inch hard disk drives, the maximum number of RAID supported drives is 16. All the other drives will remain JBOD (the drives are presented to the operating system without a RAID configuration).
- For a list of supported optional devices for the server, see the Lenovo ServerProven website.
- Inspect the drive and drive bay for signs of damage.
- Make sure that the drive is correctly installed in the drive bay.
- See the documentation for the ServeRAID adapter for instructions for installing a hard disk drive.
- All hot-swap drives in the server must have the same throughput speed rating; using drives with different speed ratings might cause all drives to operate at the speed of the slowest drive.
- You do not have to turn off the server to install hot-swap drives in the hot-swap drive bays. However, you must turn off the server when you perform any steps that involve installing or removing cables.
To remove a 2.5-inch hot-swap hard disk drive, complete the following steps:
- Read the safety information that begins Safety and Installation guidelines.AttentionStatic electricity that is released to internal server components when the server is powered-on might cause the server to halt, which might result in the loss of data. To avoid this potential problem, always use an electrostatic-discharge wrist strap or other grounding system when you work inside the server with the power on.
- Unlock the left-side cover.NoteYou must unlock the left-side cover to open or remove the bezel. When you lock the left-side cover, it locks both the cover and the bezel.
- Open the bezel (see Removing the bezel).
- Remove the filler panel, if one is present.
- Touch the static-protective package that contains the disk drive to any unpainted metal surface on the server; then, remove the disk drive from the package.
- Make sure that the tray handle is open; then, remove the 2.5-inch hard disk drive out of the hot-swap bay.
- Close the bezel.
- Lock the left-side cover.
Give documentation feedback