Removing an optional tape drive
Use this information to remove an optional tape drive.
To remove an optional full-height tape drive, complete the following steps:
- Read the safety information that begins in Safety and Installation guidelines.
- Turn off the server (see Turning off the server) and all attached peripheral devices. Disconnect all power cords; then, disconnect all external cables from the server.
- Unlock and remove the left-side cover (see Removing the left-side cover).
- Open the bezel (see Removing the bezel).
- Disconnect power and signal cables to the drive and the connectors on the system board (see Internal Cable Routing and Connectors).
- Remove the air baffle if installed (see Removing the air baffle).
- Remove the fan assembly (see Removing the fan assembly).
- Pressing the drive rail on the side of the tape drive and grasp the front of tape drive out of the server.
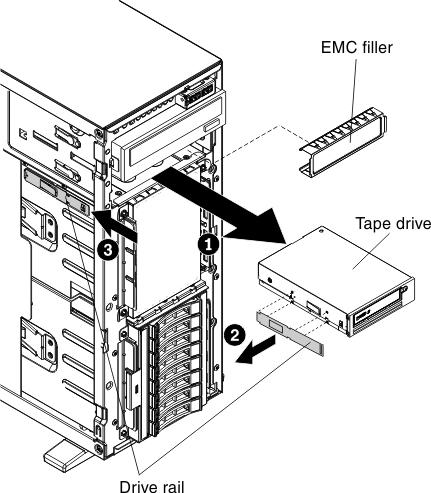
- Install the EMC shields to the tape drive bay.
If you have other devices to install or remove, do so now. Otherwise, go to Completing the installation.
Give documentation feedback