Removing a 3.5-inch simple-swap hard disk drive
Use this information to remove a 3.5-inch simple-swap hard disk drive.
Before removing a 3.5-inch simple-swap hard disk drive, read the following information:
- Inspect the drive tray for signs of damage.
- To maintain proper system cooling, do not operate the server for more than 10 minutes without either a drive or a filler panel installed in each drive bay.
- You have to turn off the server to install simple-swap drives in the simple-swap drive bays.
To remove a 3.5-inch simple-swap hard disk drive, complete the following steps.
- Read the safety information that begins Safety and Installation guidelines.AttentionStatic electricity that is released to internal server components when the server is powered-on might cause the server to halt, which might result in the loss of data. To avoid this potential problem, always use an electrostatic-discharge wrist strap or other grounding system when you work inside the server with the power on.
- Turn off the server and peripheral devices, and disconnect the power cords and all external cables.
- Unlock the left-side cover.NoteYou must unlock the left-side cover to open or remove the bezel. When you lock the left-side cover, it locks both the cover and the bezel.
- Open the bezel (see Removing the bezel).
- Move the release latch to open position and grasp the drive handle to pull the 3.5-inch simple swap drive out of the drive bay of the server.
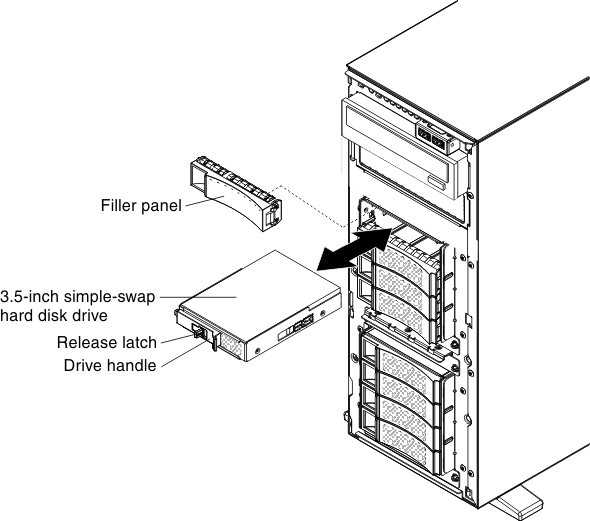
- Install the filler panel into the empty drive bay.
If you have other devices to install or remove, do so now. Otherwise, go to Completing the installation.
Give documentation feedback