Removing 2.5-inch and 1.8-inch hot-swap drives
This information provides instructions for removing the 2.5-inch and 1.8-inch hot-swap drives.
To remove a hot-swap drive, complete the following steps.
Attention: To make sure that there is adequate system cooling, do not operate the server for more than 2 minutes without either a drive or a filler panel installed in each bay.
- Before you begin, read Safety and Installation guidelines .
- Removing a 2.5-inch hot-swap drive:
- Slide the release latch (black with orange) to the left to unlock the drive handle of the drive that you want to replace.
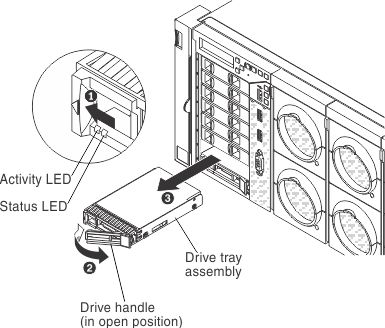
- Slide the release latch (black with orange) to the left to unlock the drive handle of the drive that you want to replace.
- Removing a 1.8-inch hot-swap drive:
- Grasp the orange and black release latch on the drive tray handle for the drive that you want to remove and slide the release latch down to unlock the drive-tray handle; then, rotate the drive tray handle to the right and the pull the handle toward you to slide the drive out of the bay. Lift the drive out of the drive tray.
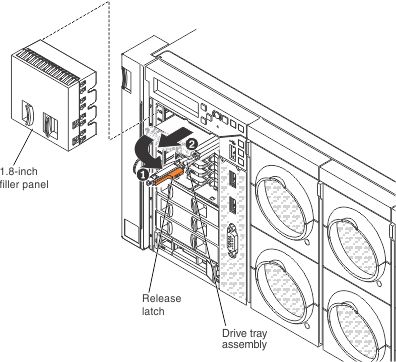
- Grasp the orange and black release latch on the drive tray handle for the drive that you want to remove and slide the release latch down to unlock the drive-tray handle; then, rotate the drive tray handle to the right and the pull the handle toward you to slide the drive out of the bay. Lift the drive out of the drive tray.
- If you are instructed to return the drive assembly, follow all packaging instructions, and use any packaging materials for shipping that are supplied to you.
Give documentation feedback