Removing the compute book cover
This information provides instructions on how to remove the compute book cover.
The compute book has a cover on the left side and a cover on the right side for access to the microprocessor and DIMMs. Use the same procedure to remove both covers.
To access the microprocessor and DIMMs 1 through 12, remove the left cover.
To access DIMMs 13 through 24, remove the right cover.
To remove the compute book covers, complete the following steps:
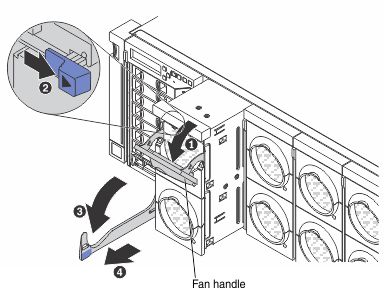
- Remove the compute book from the server. Pull the top fan-pack handle down and slide the blue release latch (behind the fan handle) to the right to release the compute book cam handle.
- Lay the compute book on its side, and press down on both blue touch points and slide the cover toward the rear of the compute book.AttentionRemove only one cover (on one side) at a time to protect the
compute book components on the other side of the compute book from being damaged. 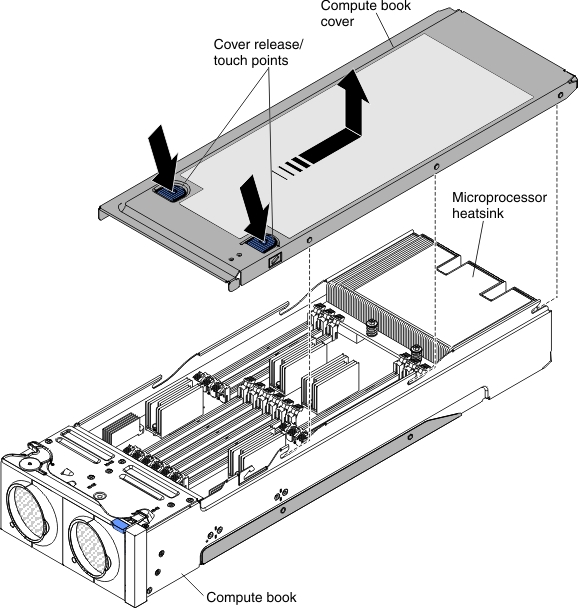
Give documentation feedback