
Replacing an ML2 (Ethernet) adapter

Use this information for instructions on how to remove an ML2 (Ethernet) adapter.

The following are illustrations of the ML2 (Ethernet) adapters that the server supports. See Supported ML2 (Ethernet) adapters for more information about the supported Ethernet adapters.
Note
Go to the Lenovo Data Center Support website and download the latest device drivers for the ML2 Ethernet adapters. Look for the Ethernet adapters under NIC adapters. Use the release notes and read.txt files for the device driver installation instructions.

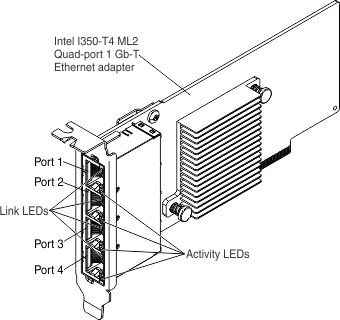
The following is an illustration of the Intel I350-T4 ML2 Quad-port 1 Gb-T Ethernet Adapter for System x:


Illustration of the Intel I350-T4 ML2 Quad-port 1 Gb-T Ethernet adapter

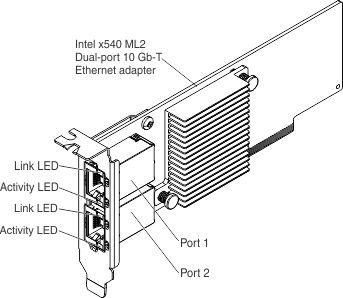
The following is an illustration of the Intel x540 ML2 Dual-port 10 Gb-T Ethernet Adapter for System x:


llustration of the Intel x540 ML2 Dual-port 10 Gb-T Ethernet adapter

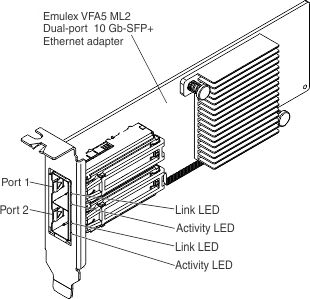
The following is an illustration of the Emulex VFA5 ML2 Dual-port 10 Gb-SFP+ Ethernet Adapter for System x:


llustration of the Emulex VFA5 ML2 Dual-port 10 Gb-SFP+ Ethernet adapter

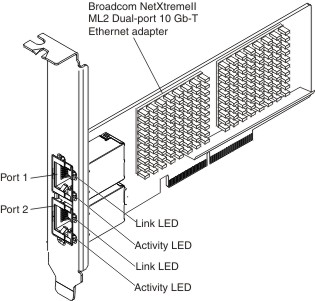
The following is an illustration of the Broadcom NetXtreme II ML2 Dual-port 10 Gb-T Ethernet adapter for System x:


Illustration of the Broadcom NetXtreme II ML2 Dual-port 10 Gb-T Ethernet adapter

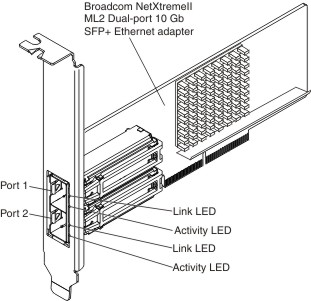
The following is an illustration of the Broadcom NetXtreme II ML2 Dual-port 10 Gb-SFP+ Ethernet adapter for System x:


llustration of the Broadcom NetXtreme II ML2 Dual-port 10 Gb-SFP+ Ethernet adapter

To replace an Ethernet adapter, complete the following steps:

Note
The illustration in this document might differ slightly from your hardware.
  1. Make sure that the adapter retention latch is in the open position.
  2. Touch the static-protective package that contains the new adapter to any unpainted metal surface on the server. Then, remove the adapter from the package.
  3. Align the edge connector on the adapter with the connector on the standard I/O book board. Press the edge of the connector firmly into the standard I/O book board connector and make sure that the adapter snaps into the connector securely.
    Attention
    When you install an adapter, make sure that the adapter is correctly seated in the connector before you turn on the server. An incorrectly seated adapter might cause damage to the standard I/O book board or the adapter.
  4. Close the adapter retention lever.
  5. Reinstall the standard I/O book in the server (see Replacing the standard I/O book.
  6. Perform any configuration tasks that are required for the adapter.
  7. Reconnect the power cord and any cables that you removed.
  8. Turn on the peripheral devices and the server.