Replacing a memory module
This topic provides instructions about how to replace a memory module.
Note
- See Installing a memory module for notes and information that you must consider when you install DIMMs. For DIMM population information, see Independent memory mode, Lockstep memory mode, Memory mirroring, and Memory rank sparing.
- Confirm that the server supports the DIMM that you are installing, see the Lenovo ServerProven website.
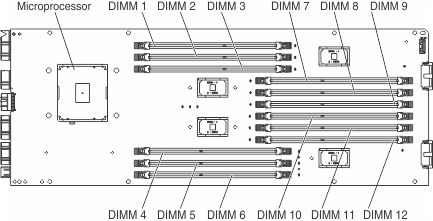
The following illustration shows the location of the DIMM connectors on the left side of the compute book board:
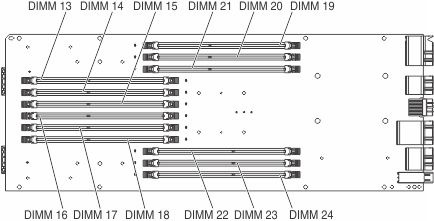
The following illustration shows the location of the DIMM connectors on the right side of the compute book board:
To install a DIMM, complete the following steps:
- Open the retaining clip on each end of the DIMM connector. AttentionTo avoid breaking the retaining clips or damaging the DIMM connectors, open and close the clips gently.

Give documentation feedback