Replacing the 4x2.5-inch hot-swap drive backplanes
Use this information for instructions on how to replace the 4x2.5-inch hot-swap drive backplane assembly.
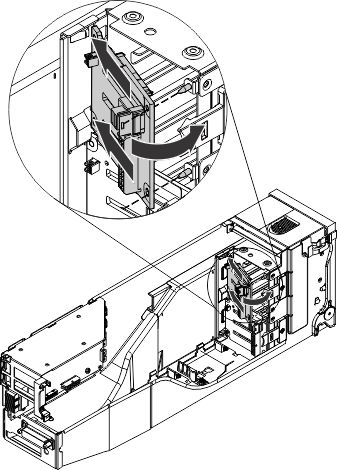
To install the replacement hot-swap 2.5-inch drive backplanes, complete the following steps:
- Align the tabs on the side of the drive backplane with the slots on the left side of the backplane cage.
- Insert the drive backplane tabs into slots on the backplane cage and pull the retention latch back, then push the drive backplane forward into the retention latch right side of the backplane cage until the backplane is locked in place.
- Reconnect the cables to the drive backplane that you removed earlier.
- Reinstall the drives that you removed from the old assembly into the new drive backplane assembly, if you have not done so (see Replacing 2.5-inch and 1.8-inch hot-swap drives).
- Reinstall the filler panels.
- Reinstall the storage book into the server.
- Reconnect the power cords and any cables that you removed.
- Turn on the peripheral devices and the server.
Give documentation feedback