Removing a memory module

This topic provides instructions about how to remove a memory module.

To remove a dual inline memory module (DIMM), complete the following steps:

Note
You can press the light path button on the compute book to light the LEDs on the board when the compute book has been removed from the server. Any LEDs that were light before the compute book was removed from the server will be lit when the light path button is pressed.
  1. Before you begin, read Safety and Installation guidelines .
  2. Turn off the server (see Turning off the server) and all attached peripheral devices. Disconnect all power cords; then, disconnect all external cables as necessary to replace the device.
  3. Remove the compute book (see Removing a compute book).
  4. Remove the cover on the side of the compute book where the failed DIMM is located. Press down on the two blue touch points and slide the cover toward the rear of the compute book; then, set it aside.
    Attention
    Remove only one cover (on one side) at a time to protect the compute book components on the other side of the compute book from being damaged.
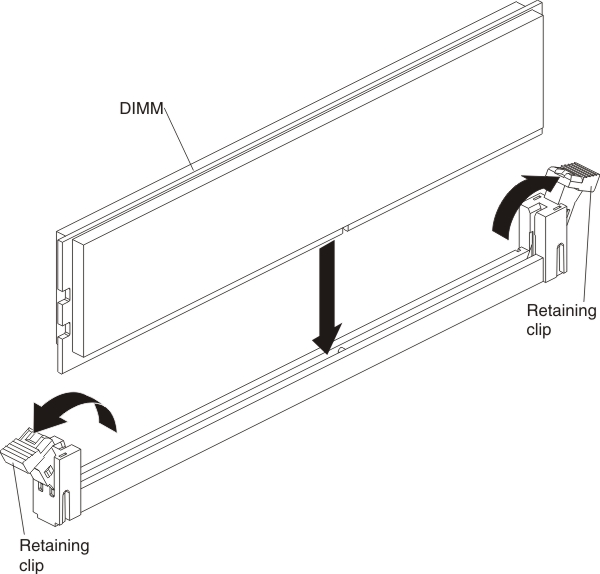
  5. Carefully open the retaining clips on each end of the DIMM connector and remove the DIMM.
    Attention
    To avoid breaking the retaining clips or damaging the DIMM connectors, open and close the clips gently.

    Illustration that shows the DIMM retaining clips in the open position.
  6. If you are instructed to return the DIMM, follow all packaging instructions, and use any packaging materials for shipping that are supplied to you.